This post will demonstrate how to read an analog value from an Arduino Uno over a serial connection. This is an updated version of this post.
This demonstration requires the following hardware:
As a first step upload the following sketch to the Arduino Uno. This can be done with the Arduino software.
The following sketch will continuously read the A0 analog pin and send the data value over the serial connection; because we are writing single bytes we divide the data value 'val' by 4 to rescale 0-1023 to 0-255. The data value correspond's to the voltage level from the signal pin, i.e. 1023 corresponds to 5 volts, while 0 corresponds to 0 volts.
 int pin = A0;
 int val = 0;

 void setup()
 {
   pinMode(pin, INPUT);
   Serial.begin(115200);
 }

 void loop()
 {
  val = analogRead(pin);
  Serial.write(val/4);
  }
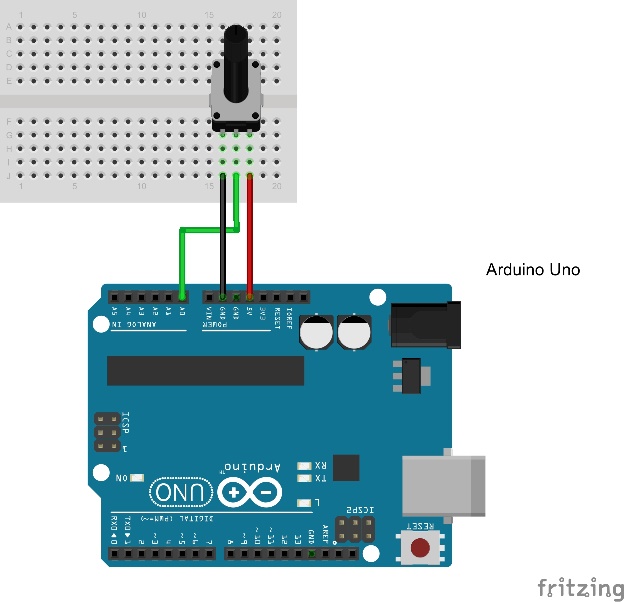
Next configure your hardware as shown in the fritzing diagram below. Most potentiometers have three pins: one for power, one for ground, and the last for signal. The ground and power pins are typically on the outside, and the signal is typically in the middle.

Now we can plug the Arduino into either your Raspberry Pi or your computer with the desktop version of the Wolfram Language.
Now we need to connect to the Arduino over serial in Mathematica with the following command
serial = DeviceOpen["Serial", {"/dev/ttyACM0", "BaudRate" -> 115200}]
This is using the Raspberry Pi's serial connection, however on other machines the command may be slightly different as an alternative serial port may be needed. One easy way to determine which serial port the Arduino is attached to is to open up the Arduino software and go under Tools -> Serial port. This should display which serial port your Arduino is attached on. Replace "/dev/ttyACM0" with your serial port.
To read the last value (most current value) of the potentiometer, we take the last value of the serial buffer with the following command.
ReadPotValue[] := Last[ DeviceReadBuffer[serial] ]
This will return the raw byte value of the potentiometer (0-255). We can now schedule this task to be run every 0.33 seconds.
(On the desktop version of the Wolfram Language, this time can be decreased, but 0.33 is about as low as you can go on the Raspberry Pi)
RunScheduledTask[val = ReadPotValue[], 0.33]
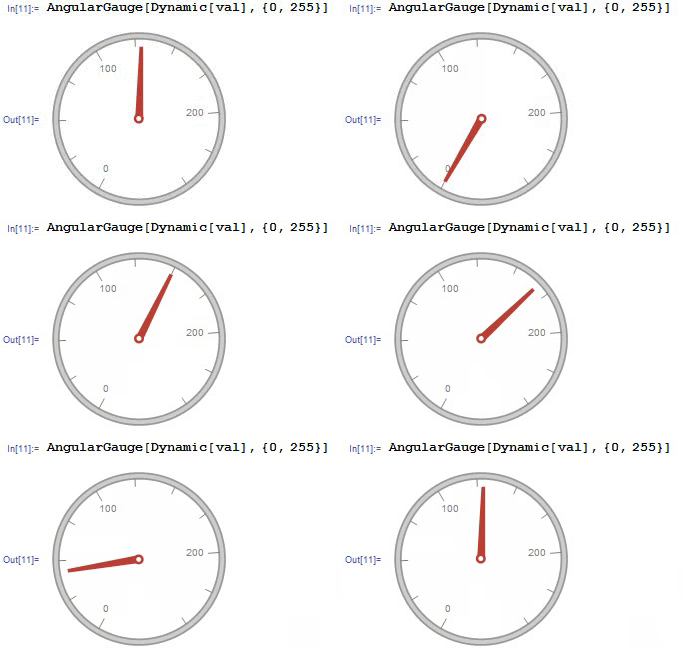
This will take a new reading three times a second. To visualize the value of the potentiometer, we can use the new Wolfram Language Function, AngularGauge.
AngularGauge[Dynamic[val], {0, 255}]
Now turning the potentiometer will update the gauge.

Here is a more in-depth video of everything in action.