Before I start, some background information: when I was doing my PhD in the Netherlands it was the tradition of the group to make a goodbye video for the young doctor who just graduated, poking a little fun at their work, their habits, et cetera; to have some fun and tell them goodbye. I made several of them, and over time they got more and more professional. Last year we made a video that was inspired by the movie Inception. I really wanted to make an intro video like the original Warner Brothers video (see here):

The group I did my research in is called the Physics of Fluids group, so we wanted to change the lettering of the video. Though I know a bit of editing in Premiere Pro and After Affects and 3D modelling in SolidWorks, recreating this seemed to be a challenge....
So after a bit of thinking I think I could it in Mathematica using the Wolfram Language! This time I will not explain all the details of the code as it is messy long code that is used just once. I will briefly show the methodology. But before doing so, please enjoy the end result first:
See here on YouTube

Ok let's jump in to the process:
To start, I created a flat logo in a PDF file using Illustrator:

As you can see, there are the letters (POF for Physics Of Fluids), and the 'shield' around it saved as an ordinary PDF file. Mathematica can read this in and we can get the polygons:
$HistoryLength=1;
SetDirectory[NotebookDirectory[]];
gra=Import["pof.pdf","Pages"][[1]][[1]];
pts=Cases[gra,List[List[_Real,_Real]...],\[Infinity]];
pts=SortBy[pts,Length];
shield=pts[[-1]];
letters=pts[[-6;;-2]];
buildings=pts[[;;-7]];

mid=Mean[shield]+{0,-160};

shield=(#-mid)&/@shield;
shield*=1.03;
letters=Map[#-mid&,letters,{2}];
buildings=Map[#-mid&,buildings,{2}];
buildn=Length[buildings];
buildingheights=RandomInteger[{180,350},buildn];
buildingcols=RandomReal[{0.15,0.24},buildn];
buildingcols=GrayLevel/@buildingcols;
Graphics[{Thick,Line[1.05shield],Line[0.95shield],Riffle[buildingcols,Polygon[buildings]],Line[letters],Red,Point[{0,0}]}]

This reads the PDF and recognises the different pieces and shift and scales things around. As you can see I made the variables 'shield' for the outer 'shield'. The contours of letters, and the blueprints of the buildings. For each building I create random heights, and each building has a random gray color.
Now I have an entire bunch of code (some pieces borrowed; sorry can't find the original author anymore) and many custom code to 'extrude' the blueprints et cetera. The file at the end has all the code, that you can run yourself.
First the houses are extruded, and randomly square and cylindrical chimneys are placed on top of each building: 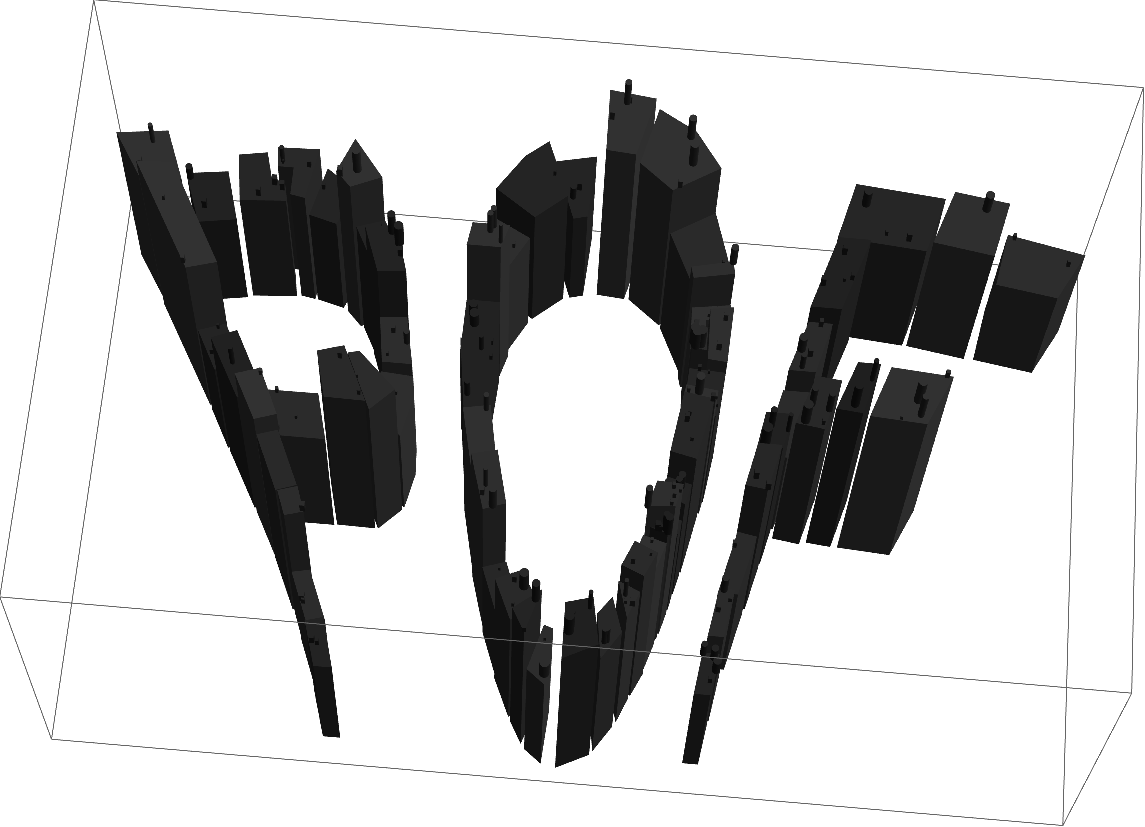
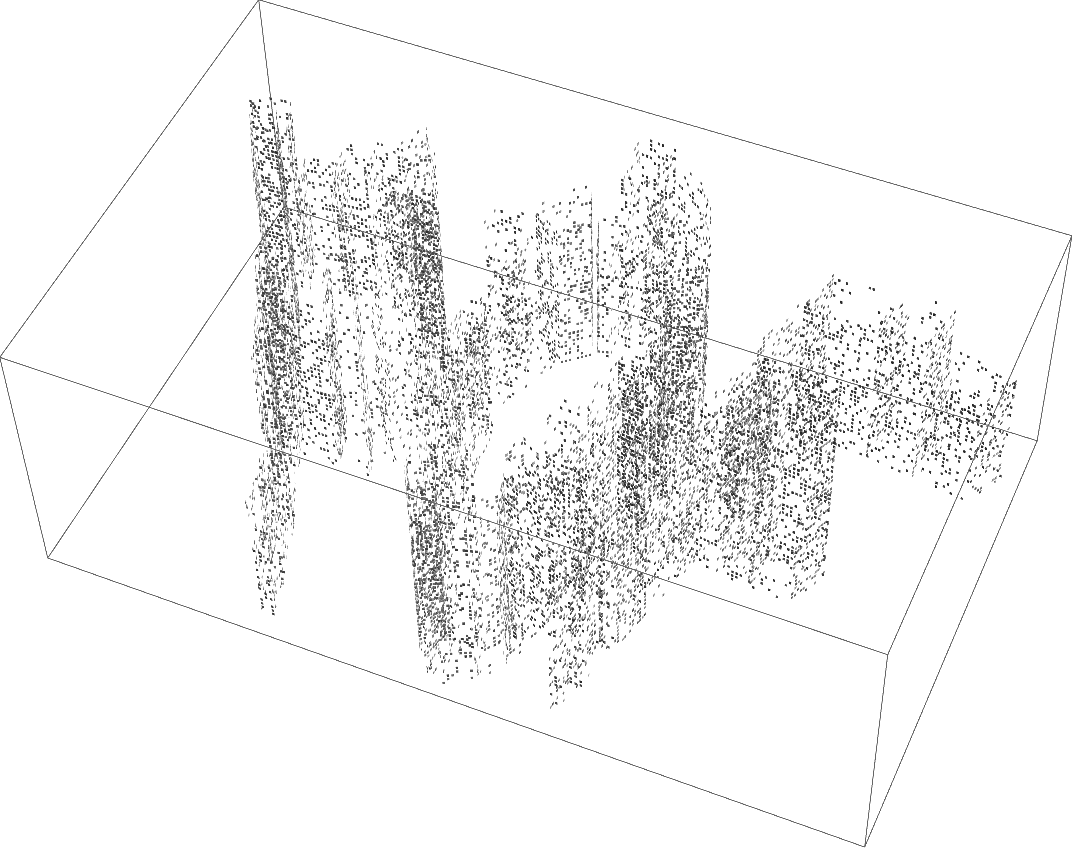
Now each building needs windows, some with lights on, and some off. The width and height of each 'face' of each building is measured, and then the number of window-panes is randomly chosen. The brightness of each window is chosen randomly and is drawn like a Hexahedron that is slightly in and outside the building (to avoid drawing errors). Rougly 16000 windows (roughly 200000 triangles) are drawn:
The shield outside is created by connecting the two polygons, extruding it, and slightly 'arc' it (~9000 polygons): 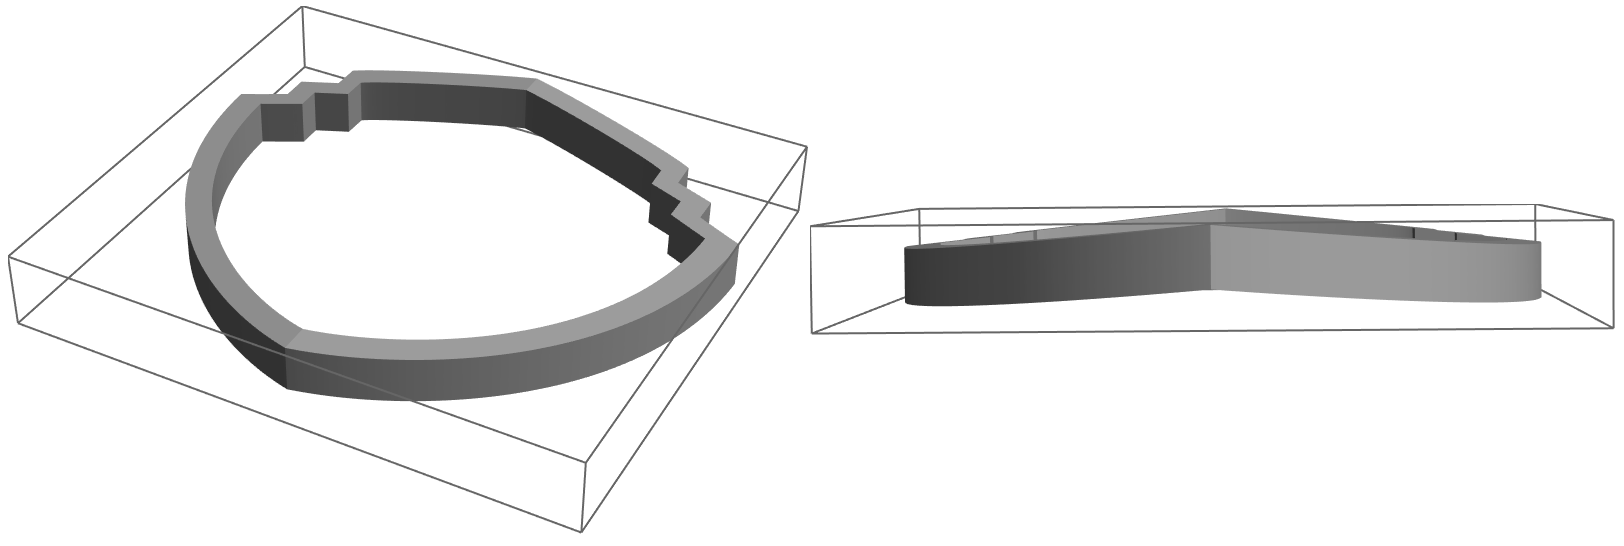
The top arc is created from a formula and is extruded again:

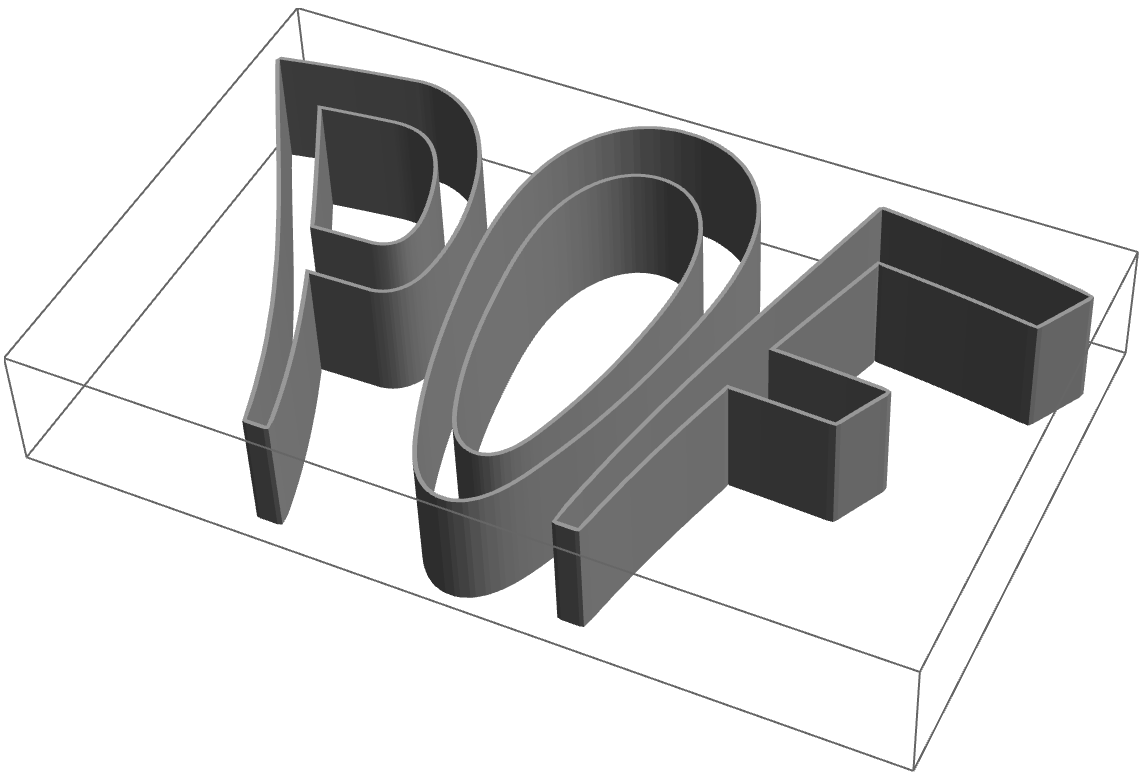
The letters of Physics of Fluids are extruded, and follow the curvature of the top arc (~7500 polygons):

And similarly for the bottom "Movie productions" text (~7800 polygons):

Finally the letters have some extruded contour (6000 polygons):
All of these primitives are combined with their directives, and are combined with specific lighting for each of the items to create the final scene:

This scene has a lot of polygons, colors and other directives:
Total[Cases[scene, Polygon[x_] :> If[Depth[x] == 3, 1, Length[x]], \[Infinity]]]
Count[scene, Hexahedron[_], \[Infinity]]
Count[scene, Cylinder[___], \[Infinity]]
Count[scene, Cuboid[___], \[Infinity]]
Count[scene, {"Point" | "Ambient", ___}, \[Infinity]]
Count[scene, _?ColorQ, \[Infinity]]
giving:
32880
16003
63
106
17
16157
That's around 250000 polygons a handful of cylinders, and 16000 color directives, and 17 lighting directives to give every part the proper appearance!
I save this scene:
Export["scene.wdx", scene]
Now to the render part, which seems to be easy at first, but It was quite tricky to get it right!
So let's make a camera path using key-frames, and using Spline interpolation to create a smooth camera-path:
SetDirectory[NotebookDirectory[]];
$HistoryLength=1;
scene=Import["scene.wdx"];
keyframes={
{0,{{0,0,10000},{0,150,150}},0},
{1,{{0,-500,7500},{0,170,150}}},
{2,{{0,-2200,5300},{0,200,150}}},
{3,{{0,-3400,2900},{0,260,150}}},
{4,{{0,-1700,500},{0,420,150}}},
{4.5,{{0,300,150},{0,1000,150}}}
};
ClearAll[darkness]
darkness[t_]:=If[t<4.2,0,(t-4.2)/0.3]
cx={keyframes[[All,1]],keyframes[[All,2,1,1]]}\[Transpose];
cy={keyframes[[All,1]],keyframes[[All,2,1,2]]}\[Transpose];
cz={keyframes[[All,1]],keyframes[[All,2,1,3]]}\[Transpose];
px={keyframes[[All,1]],keyframes[[All,2,2,1]]}\[Transpose];
py={keyframes[[All,1]],keyframes[[All,2,2,2]]}\[Transpose];
pz={keyframes[[All,1]],keyframes[[All,2,2,3]]}\[Transpose];
opts=Sequence[InterpolationOrder->2,Method->"Spline"];
fcx=Interpolation[cx,opts];
fcy=Interpolation[cy,opts];
fcz=Interpolation[cz,opts];
pcx=Interpolation[px,opts];
pcy=Interpolation[py,opts];
pcz=Interpolation[pz,opts];
ClearAll[CameraViewAngle,CreateFrame]

sectionsWide=5;
sectionSize=2000;

CameraViewAngle[t_]:={{fcx[t],fcy[t],fcz[t]},{pcx[t],pcy[t],pcz[t]}}
CreateFrame[t_,fn_String]:=Module[{gr,cva,cnt},
cva=CameraViewAngle[t];
gr=Graphics3D[{Antialiasing->True,scene}
,Background->Black
,Boxed->False
,Lighting->{{"Point",White,{0,400,1600},{0,0,10}}}
,ViewVector->cva
,ViewAngle->55Degree
,ViewVertical->{0,1,1}
];
gr=Rasterize[gr,"Image",RasterSize->2{1080,1080}];
If[darkness[t]>0,
gr=Blend[{gr,Black},darkness[t]];
];
Export[fn,gr]
]
Graphics[{(CameraViewAngle/@Range[0,4.5,1/30])[[All,1,{2,3}]]//Point,Red,PointSize[Large],(CameraViewAngle/@Range[0,4,1])[[All,1,{2,3}]]//Point}]
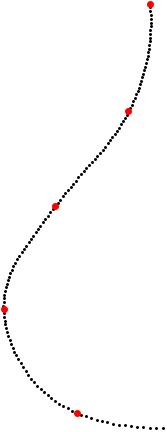
The red point are the key-frame positions of the camera, and the dotted path is the trajectory followed. Using the function CreateFrame we can now create a single frame:
CreateFrame[0, "fileout0.png"]
where the first argument is the time, and the second the filename of the saved file:

Though I specifically ask for an antialiased image of 2160x2160, you will notice it is not anti-aliased. This has to do with the rendered on most operating systems, to get 4x AA the resolution is increased in each direction, the actual rendered image is thus much bigger than the ~4 megapixel I in the end get. Unfortunately, mac systems (OpenGL?) have a limitation for the maximum size of the rendered image of 16384x16384 (14 bit each), and therefore anti-aliasing is switched off for large renders. However, the video looks terrible when there is no anti-aliasing. The windows are of the size of a single pixel and therefore flicker a lot; something we do not want! So what to do? Of course I could export the scene and use povray or so to render it, but that would be too easy. After some consulting I found out that I could render the scene in blocks separately, and then combine the blocks, artificially creating very high levels of anti-aliasing and high pixel count renders:
CreateFrame[t_,fn_String]:=Module[{gr,cva,cnt},
cva=CameraViewAngle[t];
gr=Graphics3D[{Antialiasing->True,scene}
,Background->Black
,Boxed->False
,Lighting->{{"Point",White,{0,400,1600},{0,0,10}}}
,ViewVector->cva
,ViewAngle->55Degree
,ViewVertical->{0,1,1}
];
cnt=0;
Table[cnt++;
If[!FileExistsQ[fn<>"_"<>ToString[cnt]<>".png"],Export[fn<>"_"<>ToString[cnt]<>".png",
Show[gr,
ViewAngle->((*35*)55Degree/sectionsWide),
ViewCenter->{{1,1,1}/2,ImageScaled[{y,x}]}
],
"PNG",
Background->None,
ImageSize->sectionSize{1,1}
]],
{x,1-sectionsWide/2,sectionsWide/2,1},
{y,sectionsWide/2,1-sectionsWide/2,-1}
];
]
This will render each frame in 25 blocks (5 rows, 5 columns). In total I created 300 frames, each 25 blocks, so 7500 images. Each block is 4 megapixel after rendering, during rendering you have a factor 4 more pixels in each direction because of AA, and 2 from the retina-scaling on my macbook. So each block is actually 16000x16000 = 256 megapixel (just below the maximum of 16384 viewport). So each frame was rendered originally at 25x256 = 6400 megapixel (6.4 gigapixel), and is saved as 100 megapixel stills. These are then combined in to a movie! To summarise almost 2 terapixels are rendered in total to create the final video, I remember it took a night or so to render...
Hope you enjoyed! And now you know some of the tricks needed to render big things!
 Attachments:


