Objective
The objective of this project is to develop video lectures for a first year online "Introduction to Problem Solving with Mathematica" course using the Wolfram Courseware Palette. Starting with the Courseware Tools and a video recording program (I used Zoom), I was able to record two videos in two to three weeks, mostly starting from scratch. Now I feel production time will be improved after learning about some of the "tricks-of-the-trade" on using the tools and a little bit of practice. If you are interested in recording Mathematica lectures, start by watching the video and downloading the courseware pallete using the CourseWare Tools link, above.
General Instructions
There are two utilities that come with the Courseware Palette:
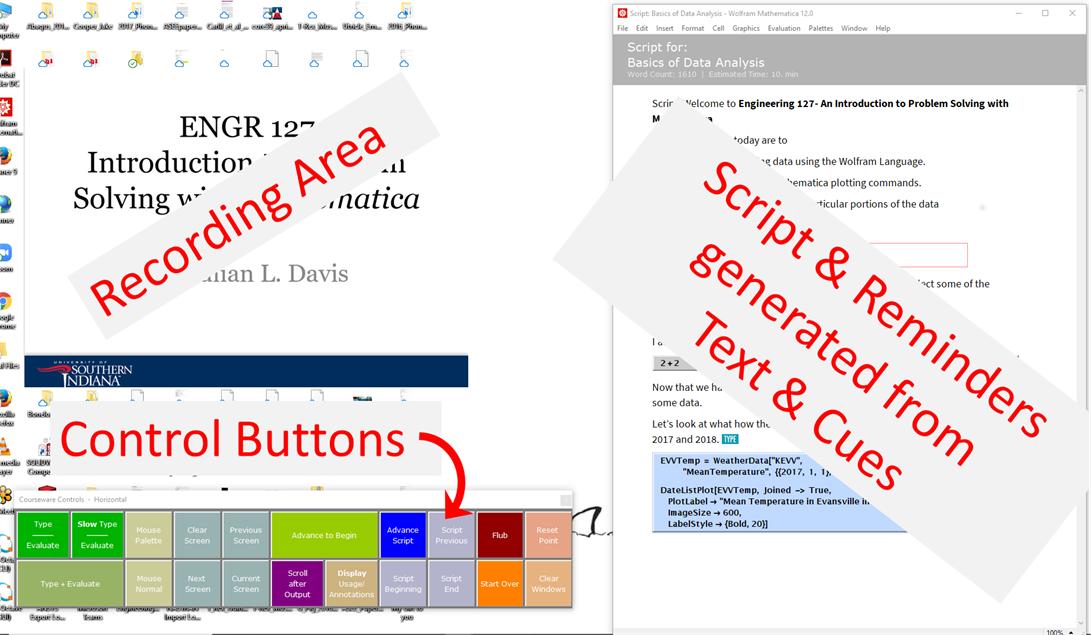
Courseware Controls and 
Lecture Notebook Template 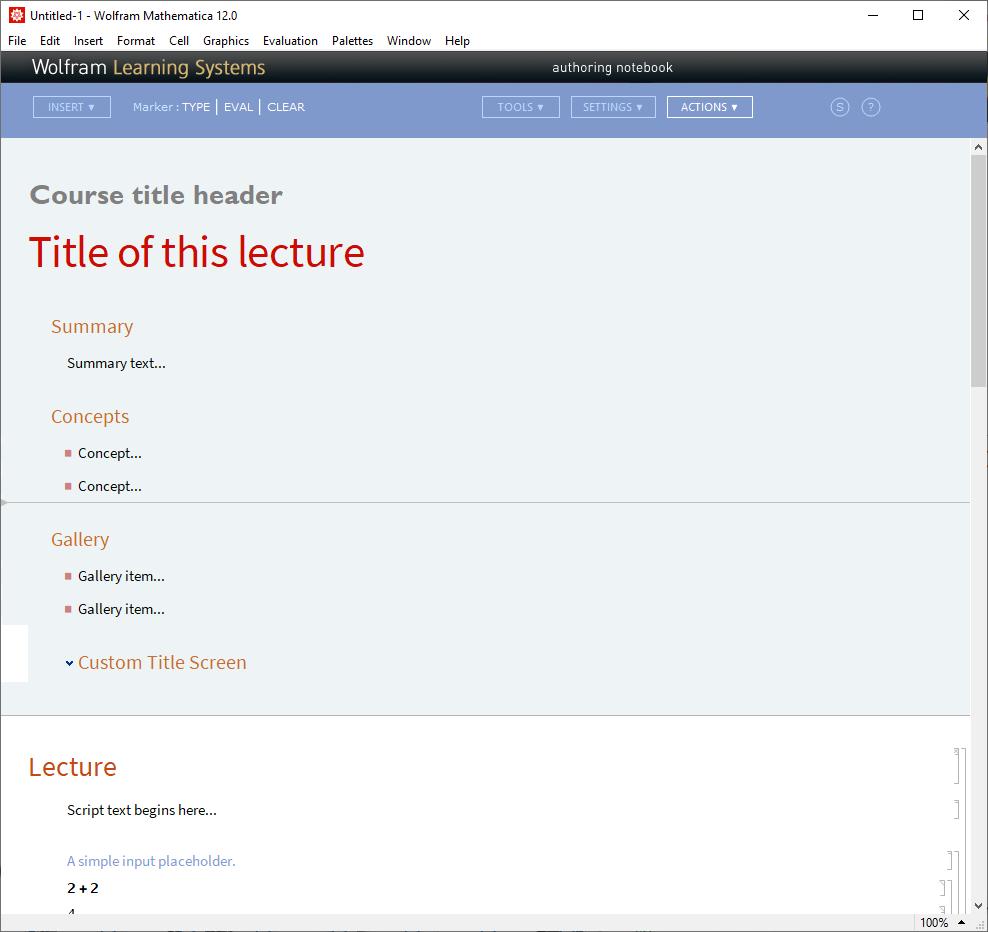
General Flow
Write your lecture in the Lecture Notebook Template, and when you are ready to record your video:
- Generate your transcript and recording window. Your text/script will be output to a new window with just text for you to read and "buttons over the input commands" that can be pressed to simulate typing in the recording window. Not that the recording window will not have the "File-Edit-inset" menu bar.
Set up your video conferencing software to record (or share) the recording/output window, 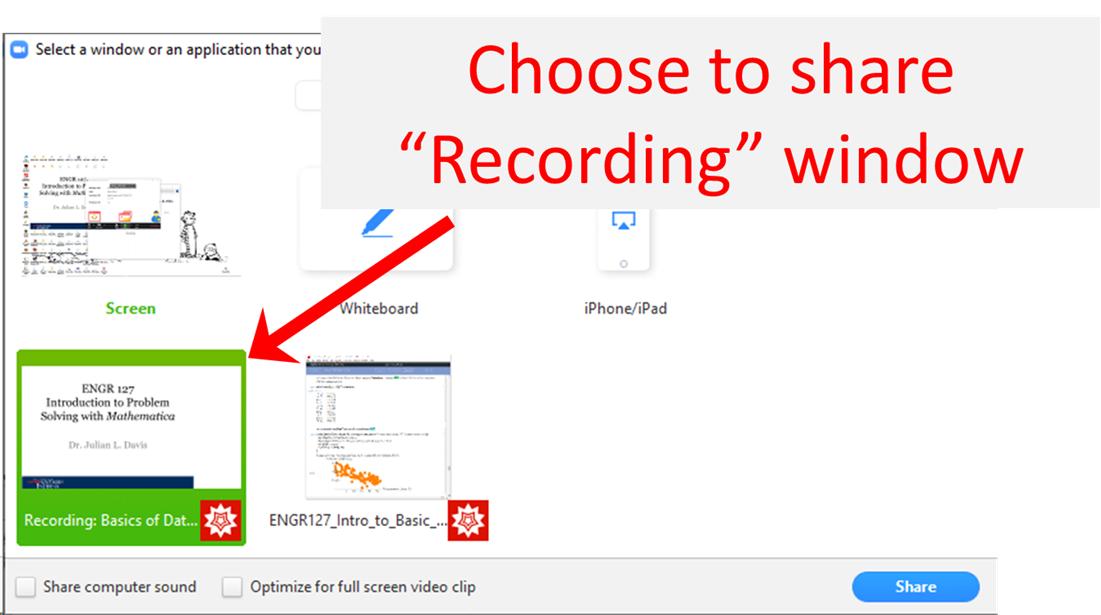
Press record and
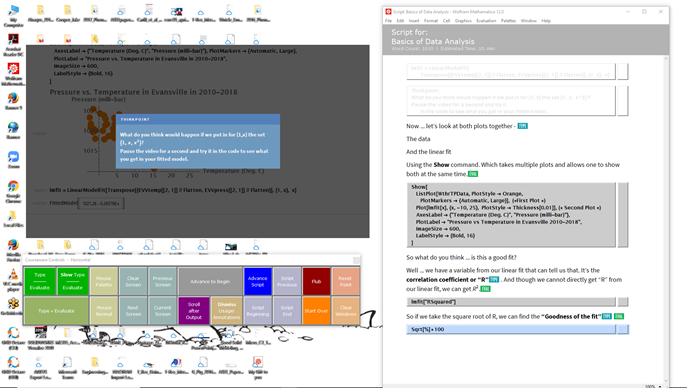
Start narrating and executing your notebook code.
End the meeting and publish your recording. Note: Zoom automatically generates a video and audio file of the recording when a meeting has ended.
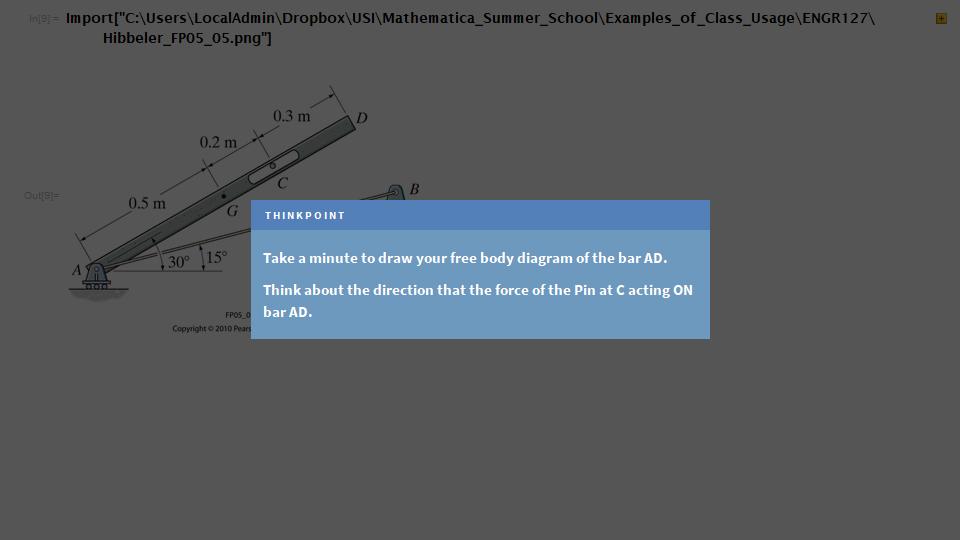
Thinkpoint Feature
There are several features within the Lecture Template that allow users to reference websites, external camera input, or specific images that are not in the notebook itself. One of the neat features of this software is the "Thinkpoint" feature. This is a wonderful way to break up a lecture and ask students to take a moment to think about a topic.
Here's an example of how it could be used it in an online engineering statics course.
Slow Type Feature
This feature allows the lecturer to simulate typing at a reasonable speed to allow a viewer/student to follow along with the video. This is a wonderful feature to force the lecturer keep a reasonable pace allowing students to keep up .
A Couple of Issues
- Once you set up your recording configuration, the only way to make changes is to reset the entire configuration. I started working with a laptop using a two screen configuration with the recording window on the 2nd screen. But when I went to practice the recording with just my laptop, the recording window was now-where to be found. The software defaulted to having the recording window on the "2nd screen" even though there was no external screen attached.
- Part of the Lecture notebook Template are un-editable. It would be nice to see some of the section headings come into the script that is exported from the template, but that is not happening yet.
- The title screen does not by default expand to full screen when recording has started. You have to test the size of the image in the Lecture Notebook each time a recording configuration in generated.
- Switching between different screens for recording is not recommended. Checkpoint and Thinkpoint features will not appear if screen resolutions change between external monitors. This could be fine if not working with two screens, but just be aware.
- in the script, there are "buttons over the code" that simply act a "Type and Evaluate" buttons - they do not specifically type/evaluate the code that is over/under the button. This is a little misleading and frustrating. However, I do think that the text does change color. Still a little hard to follow for a new user.
- As an Engineering educator, there are times in which it would be nice to have SOME of the output/images in the script window to be able to refer to during the lecture. The best method of doing this with the features in the Lecture Template is through the "Insert -> Image Slide" feature, however the image does not stay in the script for later reference. The only way around this now is to import an image into the script window.


