I am a data scientist from Amazon, specifically AWS AI, ML Solutions Lab. I've been coding for 10 years, and Wolfram Language / Mathematica is my "mother" language in programming world, and my first understanding of computational thinking, therefore, I hope to make it popular.
Amazon SageMaker is a fully managed service that provides every developer and data scientist with the ability to build, train, and deploy machine learning (ML) models quickly. SageMaker removes the heavy lifting from each step of the machine learning process to make it easier to develop high quality models.
Just like AWS's EC2 instances, SageMaker also allows you to pick an instance that best works with your computational demand. You can configure memory, storage & type, GPU, CPU, internet speed, etc.
In order to play Wolfram Language in the SageMaker, we need to install Wolfram Engine and activate Wolfram Script and use a font-end supporting package.
Step 1: Get Wolfram Engine.
sudo yum install wget

sudo wget https://account.wolfram.com/download/public/wolfram-engine/desktop/LINUX
Step 2: Install Wolfram Engine:
sudo bash LINUX

---------------------------------------------------------------------------------------------------------------------------------------------------
                                                          Wolfram Engine 12.0 Installer
---------------------------------------------------------------------------------------------------------------------------------------------------

Copyright (c) 1988-2019 Wolfram Research, Inc. All rights reserved.

WARNING: Wolfram Engine is protected by copyright law and international treaties. Unauthorized reproduction or distribution may result in
severe civil and criminal penalties and will be prosecuted to the maximum extent possible under law.

Enter the installation directory, or press ENTER to select /usr/local/Wolfram/WolframEngine/12.0:
>

Now installing...

[************************************************************************************************************************************************]

Type the directory path in which the Wolfram Engine script(s) will be created, or press ENTER to select /usr/local/bin:
>

NOTE: Unable to determine the package manager used by the system--skipping the install of WolframScript system integration. Installer
packages in the RPM and DEB formats have been left in "/usr/local/Wolfram/WolframEngine/12.3/SystemFiles/Installation". Consult your system
documentation on how such packages might be installed.

WARNING: No Avahi Daemon was detected so some Kernel Discovery features will not be available. You can install Avahi Daemon using your
distribution's package management system.

Go to http://avahi.org for more information.

Installation complete.
Step 3: install Wolfram Script:
3.1: Check your machine type:
sh-4.2$ cat /etc/os-release
NAME="Amazon Linux AMI"
VERSION="2018.03"
ID="amzn"
ID_LIKE="rhel fedora"
VERSION_ID="2018.03"
PRETTY_NAME="Amazon Linux AMI 2018.03"
ANSI_COLOR="0;33"
CPE_NAME="cpe:/o:amazon:linux:2018.03:ga"
HOME_URL="http://aws.amazon.com/amazon-linux-ami/"
The .deb files are meant for distributions of Linux that derive from Debian (Ubuntu, Linux Mint, etc.). The .rpm files are used primarily by distributions that derive from Redhat based distros (Fedora, CentOS, RHEL) as well as by the openSuSE distro.
Based on different machine, you will need to install wolfram script in different ways:
cd /usr/local/Wolfram/WolframEngine/12.3/SystemFiles/Installation
sh-4.2$ sudo yum localinstall wolframscript-1.6-20210521191.x86_64.rpm
Loaded plugins: dkms-build-requires, priorities, update-motd, upgrade-helper,
              : versionlock
Examining wolframscript-1.6-20210521191.x86_64.rpm: wolframscript-1.6-20210521191.x86_64
Marking wolframscript-1.6-20210521191.x86_64.rpm to be installed
Resolving Dependencies
amzn-main/latest                                              | 2.1 kB  00:00:00
amzn-updates/latest                                           | 3.8 kB  00:00:00
--> Running transaction check
---> Package wolframscript.x86_64 0:1.6-20210521191 will be installed
--> Finished Dependency Resolution

Dependencies Resolved

=====================================================================================
 Package       Arch   Version            Repository                             Size
=====================================================================================
Installing:
 wolframscript x86_64 1.6-20210521191    /wolframscript-1.6-20210521191.x86_64 6.1 M

Transaction Summary
=====================================================================================
Install  1 Package

Total size: 6.1 M
Installed size: 6.1 M
Is this ok [y/d/N]: y
Downloading packages:
Running transaction check
Running transaction test
Transaction test succeeded
Running transaction
Warning: RPMDB altered outside of yum.
  Installing : wolframscript-1.6-20210521191.x86_64                              1/1
/var/tmp/rpm-tmp.OUJ5iH: line 5: xdg-icon-resource: command not found
/var/tmp/rpm-tmp.OUJ5iH: line 5: xdg-icon-resource: command not found
/var/tmp/rpm-tmp.OUJ5iH: line 5: xdg-icon-resource: command not found
/var/tmp/rpm-tmp.OUJ5iH: line 11: xdg-mime: command not found
warning: %post(wolframscript-1.6-20210521191.x86_64) scriptlet failed, exit status 127
Non-fatal POSTIN scriptlet failure in rpm package wolframscript-1.6-20210521191.x86_64
  Verifying  : wolframscript-1.6-20210521191.x86_64                              1/1

Installed:
  wolframscript.x86_64 0:1.6-20210521191
Step 4: The last step is to activiate your engine with your developer account, and it's free!
wolframscript -activate
A simple test:
wolframscript wolframscript -code 2+2
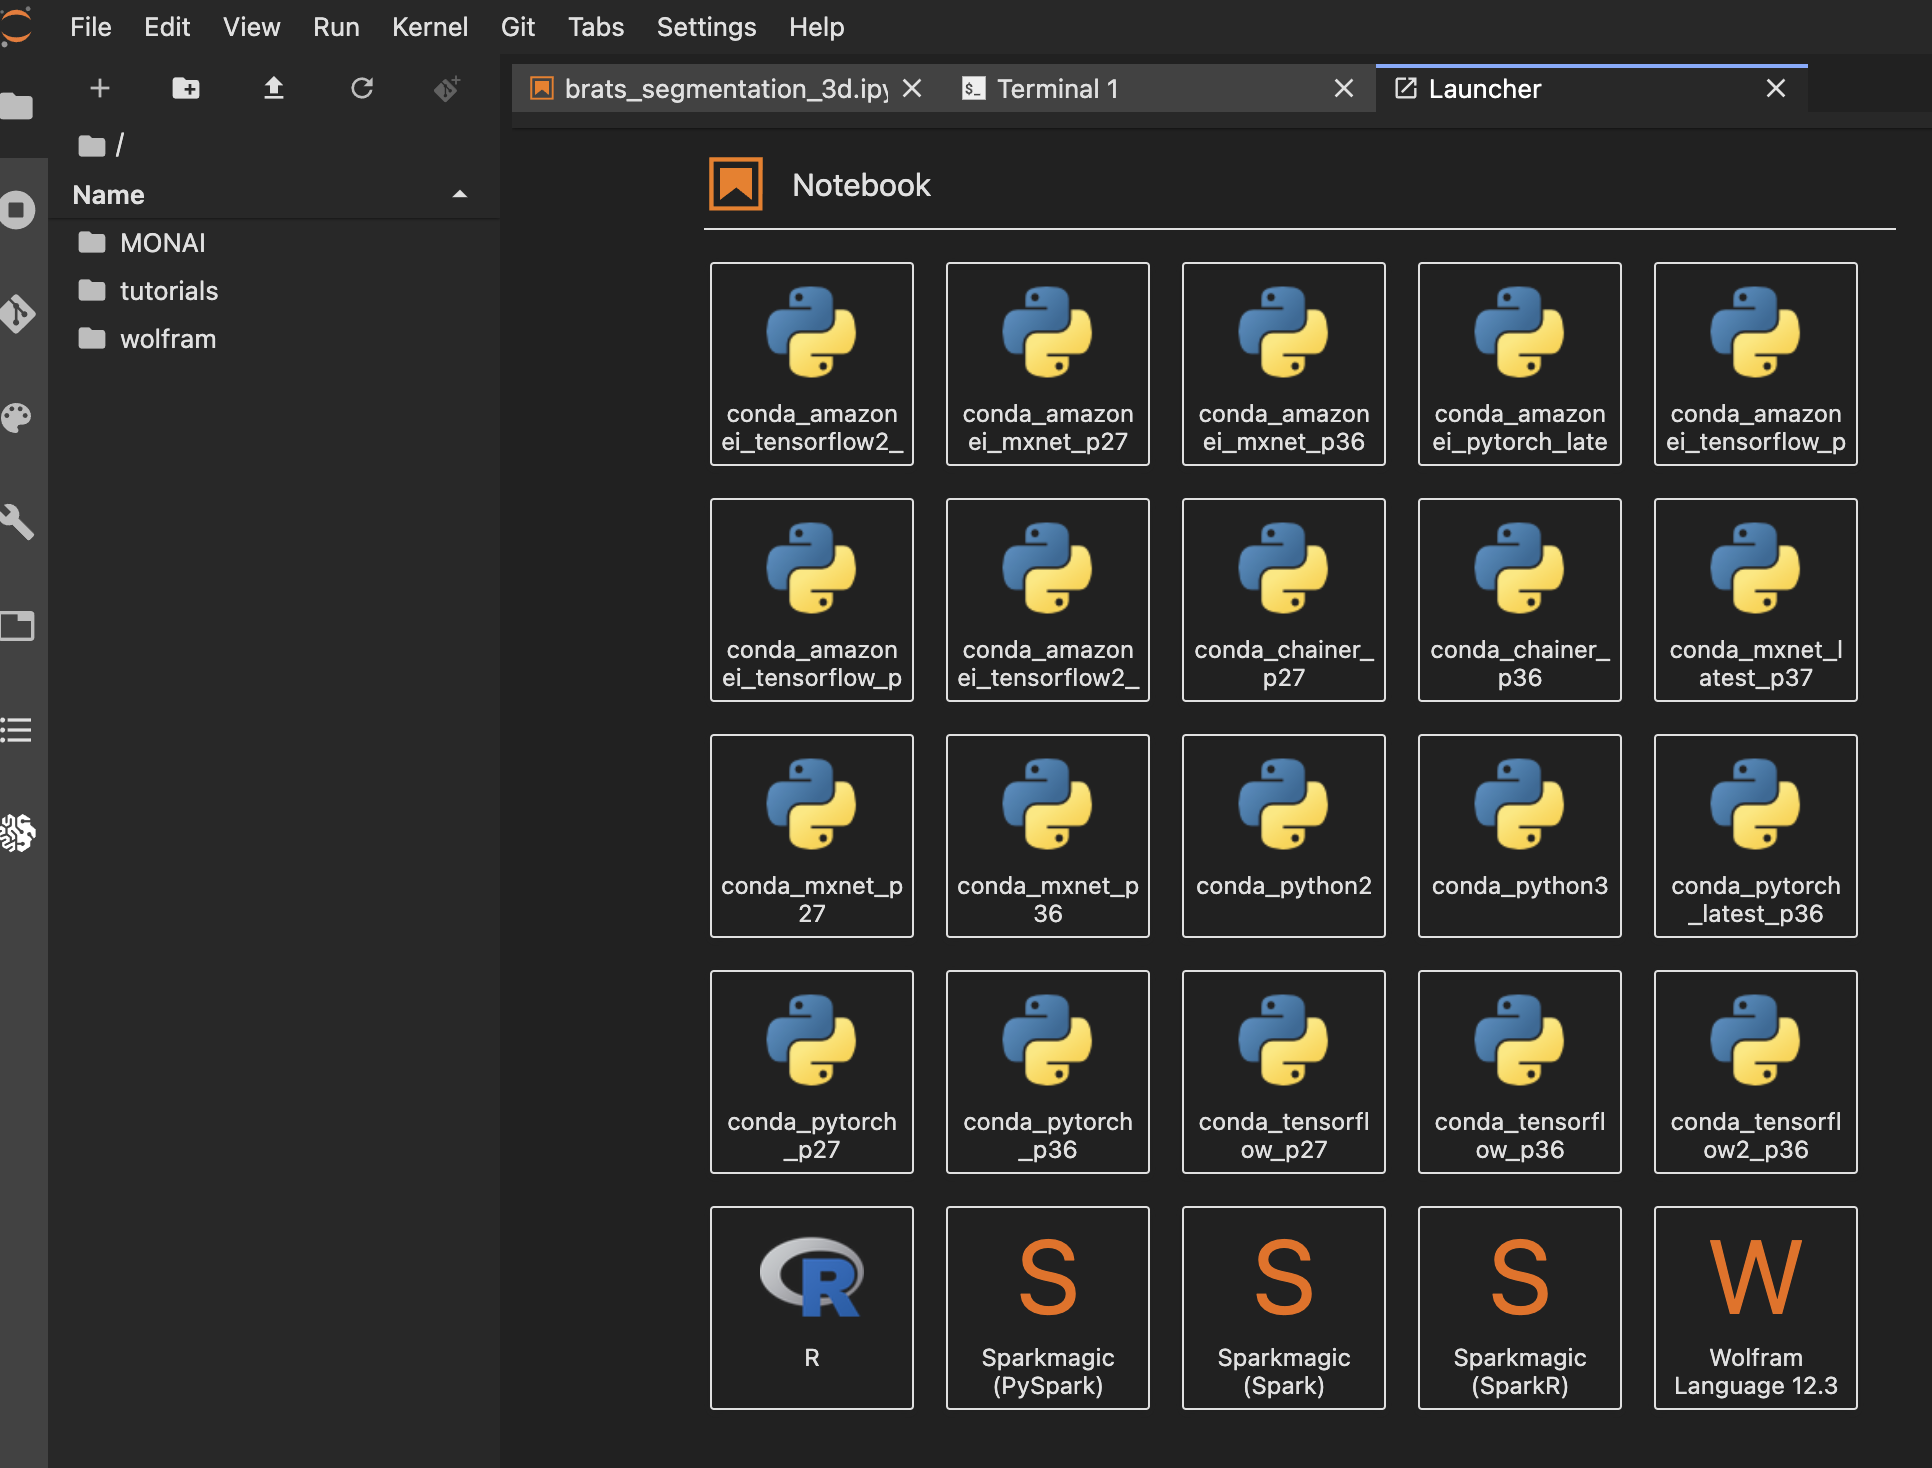
Step 5: You also will need to get the Jupyter frontend support:
cd to a directory as you desires:
sh-4.2$ cd
sh-4.2$ git clone https://github.com/WolframResearch/WolframLanguageForJupyter.git
Cloning into 'WolframLanguageForJupyter'...
remote: Enumerating objects: 2, done.
remote: Counting objects: 100% (2/2), done.
remote: Compressing objects: 100% (2/2), done.
remote: Total 511 (delta 0), reused 0 (delta 0), pack-reused 509
Receiving objects: 100% (511/511), 275.56 KiB | 4.30 MiB/s, done.
Resolving deltas: 100% (318/318), done.
sh-4.2$ cd WolframLanguageForJupyter/
sh-4.2$ ./configure-jupyter.wls add
And you will see your Wolfram Kernel in your launch page! Have fun folks!