Here, I am going to go through detailed walkthrough that will end with a fully functional Android application that can square a number given by the user. This is intended to be a tutorial for anyone who has not made a mobile app utilizing the Wolfram Cloud or is having trouble implementing that functionality into their own applications. Squaring a number is an extremely simple use of the Cloud, but this tutorial should open the way to more complex ones later on.
Creating the Cloud API
First, we need to create and deploy the API function that will be used by the app. The API will have 3 parts:
- Input - This is defined using an association. Here, our function will take one input, a number, and it will be refered to as "x".
- Function - This is a pure function that referenced the input symbol defined in (1).
- Output - This is the type of data we want to return. We'll just return our output as a String here.
api=APIFunction[
    {"x"->"Number"},
    #x^2&,
    "String"
];
Deploying this function is very similar to any other APIFunction. However, since we want this function accessible to our Android device, the Permissions option should be set to "Public".
(Side note: It is possible to access a private API function via a smartphone app. It is, however, more complicated, so we will put off this topic until later.)
CloudDeploy[api, Permissions->"Public"]
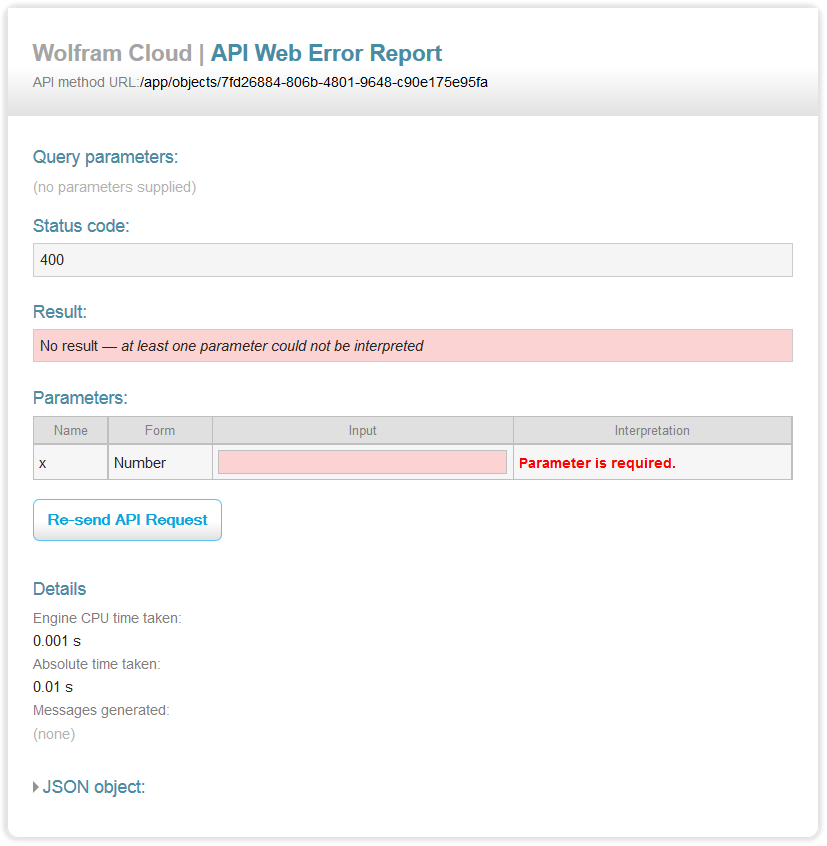
Evaluating this will output a hyperlink that leads to an API web form that looks like this: 
You can check out this form yourself by going here. Entering a number in the form and clicking "Re-send API Request" will return the square of the number you input. Alternatively, your query can be attached to the end of the url as "?x=", followed by whatever number you want to square. This is important, as this is how we will pass our number to the Cloud API within the app.
Thus, we have a working API function.
Creating an Android Application
Before digging into this section, you should be familiar with the basics of Android development. If you want to download the source code for this project, it can be downloaded here.
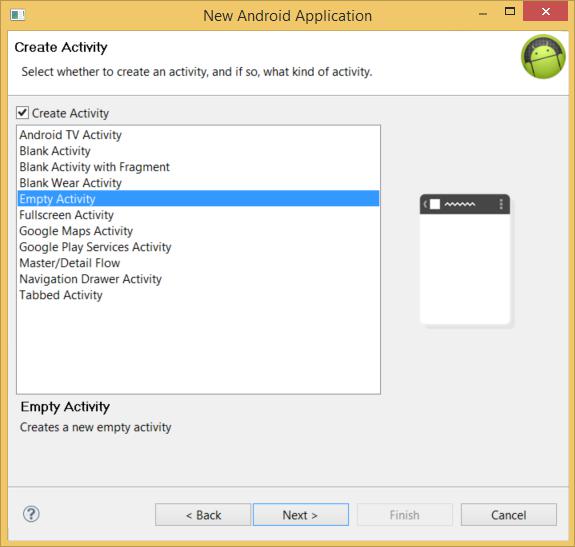
First, create a new Android Application containing an empty activity:


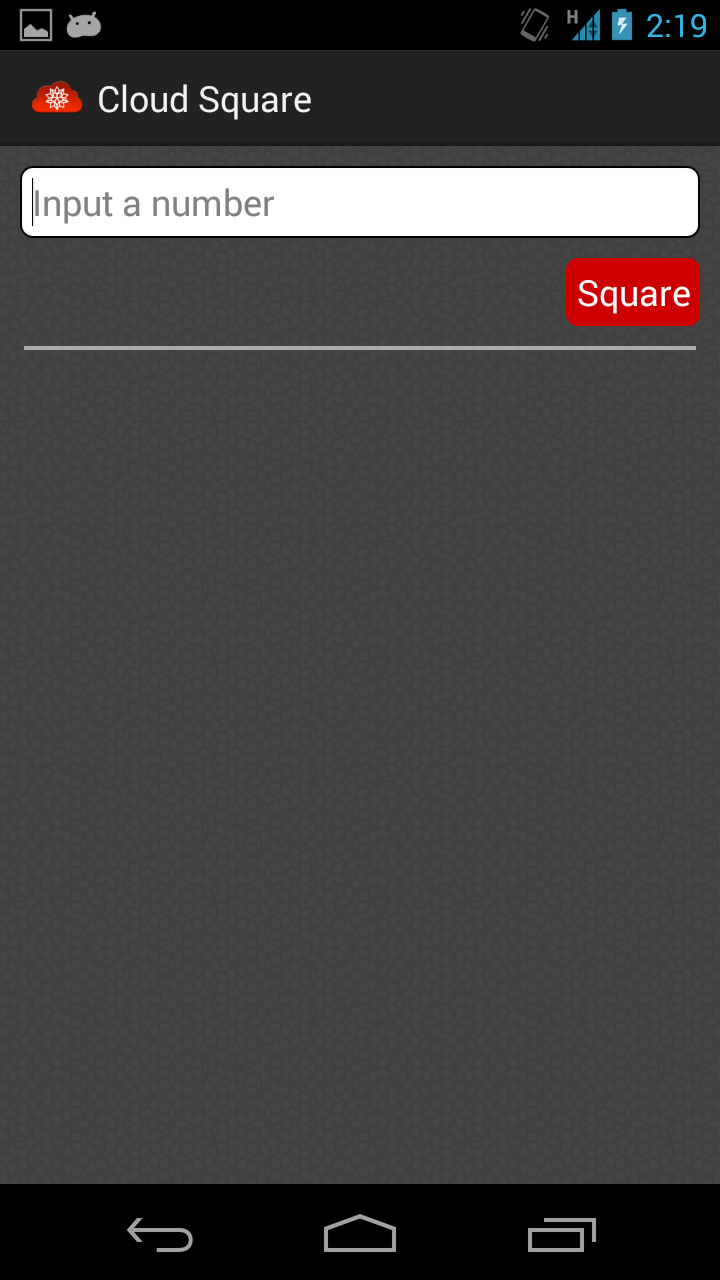
The layout of the app will look like this:

The layout is found in res/layout/activity_main.xml and the style is in res/values-v14/styles.xml. However, for now we will focus more on the Java code that allows us to use the Wolfram Cloud. The application will have 3 Java code files: CloudInterface, CloudCompute, and MainActivity. First, let us look at CloudInterface.java.
public interface CloudInterface {
    public void onEvaluateCompleted(String result);
    public String getBaseURL();
}
The main Activity will implement this interface, allowing Cloud Compute to reference methods and data members in it. This is what will allow us to pass the result of the API call to the Main Activity and display it. Next, let us look at CloudCompute.java. This class is an AsyncTask, which allows Android to do networking tasks without stopping the rest of the application. In the first line, we can see that this AsyncTask is expecting a Double as input and will return a String. The constructor then gets the Context of MainActivty, which will allow us to pass back the result of the API call.
The doInBackground method is where the call is made. First, the URL is constructed as mentioned toward the end of the first section (using "?x=" at the end of the URL). Then a URL object is created, and an input stream is formed to receive the output of that URL. Last, an onPostExecute method is run when the doInBackground method finished. This passes the result to a method in MainActivity, which will display it.
public class CloudCompute extends AsyncTask<Double, Void, String> {
    String baseURL = "";
    CloudInterface callback;

    public CloudCompute(Context c) {
       callback = (CloudInterface) c;
       baseURL = callback.getBaseURL();
    }

    protected String doInBackground(Double... params) {

       String output = "";
       for (Double numberToBeSquared : params) {
         try {
          baseURL = baseURL + "?x=" + numberToBeSquared;

          URL url = new URL(baseURL);

          BufferedReader in = new BufferedReader(new InputStreamReader(url.openStream()));

          String outLine;
          while ((outLine = in.readLine()) != null) {
              output += outLine;
          }

          in.close();

         } catch (Exception e) {
          e.printStackTrace();
         }
       }
       return output;
    }
    protected void onPostExecute(String result) {
       callback.onEvaluateCompleted(result);
    }
}
Last, we will analyze the MainActivity file. First, we need the URL of the deployed Cloud API we are using. Save this to a String variable named baseURL in the MainActivity.java file (the name is arbitrary, but this is the naming convention used across all of the sample apps we have made).
In the onCreate method, let's assign the TextView in the layout to the TextView object, then do the same to the EditText and ProgressBar.
Then, we will create a method that will be called whenever the "Square" button is clicked. First, the ProgressBar is made visible to show the user that the app is working and the previous output is cleared. Next, an InputMethodManager is used to make the keyboard disappear. Then, the contents of the field are pulled (if the field is not empty). Finally, a new instance of CloudCompute is created and executed.
Last, the onEvaluateCompleted method is run when the API call returns with a result. It makes the ProgressBar disappear and displays the result of the API call.
public class MainActivity extends Activity implements CloudInterface {
    private EditText field;
    private ProgressBar bar;
    private TextView text;

    private String baseURL = "https://www.wolframcloud.com/objects/7fd26884-806b-4801-9648-c90e175e95fa";

    @Override
    protected void onCreate(Bundle savedInstanceState) {
       super.onCreate(savedInstanceState);
       setContentView(R.layout.activity_main);

       field = (EditText) findViewById(R.id.field);
       bar = (ProgressBar) findViewById(R.id.progressBar);
       text = (TextView) findViewById(R.id.textView);
    }

    public void buttonClick(View v) {

       bar.setVisibility(View.VISIBLE);
       text.setText("");

       InputMethodManager imm = (InputMethodManager) getSystemService(Context.INPUT_METHOD_SERVICE);
       imm.hideSoftInputFromWindow(field.getWindowToken(), 0);

       Double num = 0.0;
       if(!field.getText().toString().equals(""))
         num = Double.parseDouble(field.getText().toString());

       CloudCompute cc = new CloudCompute(this);
       cc.execute(num);
    }

    @Override
    public void onEvaluateCompleted(String result) {

       bar.setVisibility(View.GONE);

       if (result.endsWith("."))
         result = result.substring(0, result.length() - 1);

       text.setText(result);
    }

    @Override
    public String getBaseURL() {
       return baseURL;
    }
}
With that, we are almost finished making an app that can use the Wolfram Cloud to make computations. To ensure that our app is allowed to make network calls, the following line must be added to the Manifest file:
<uses-permission android:name="android.permission.INTERNET"/>
And that's it! We now have an Android application that uses the Wolfram Cloud to perform a computation. Again, the code for this project can be downloaded here. This project and be imported straight into Eclipse and run on any device running Android 4.0+.