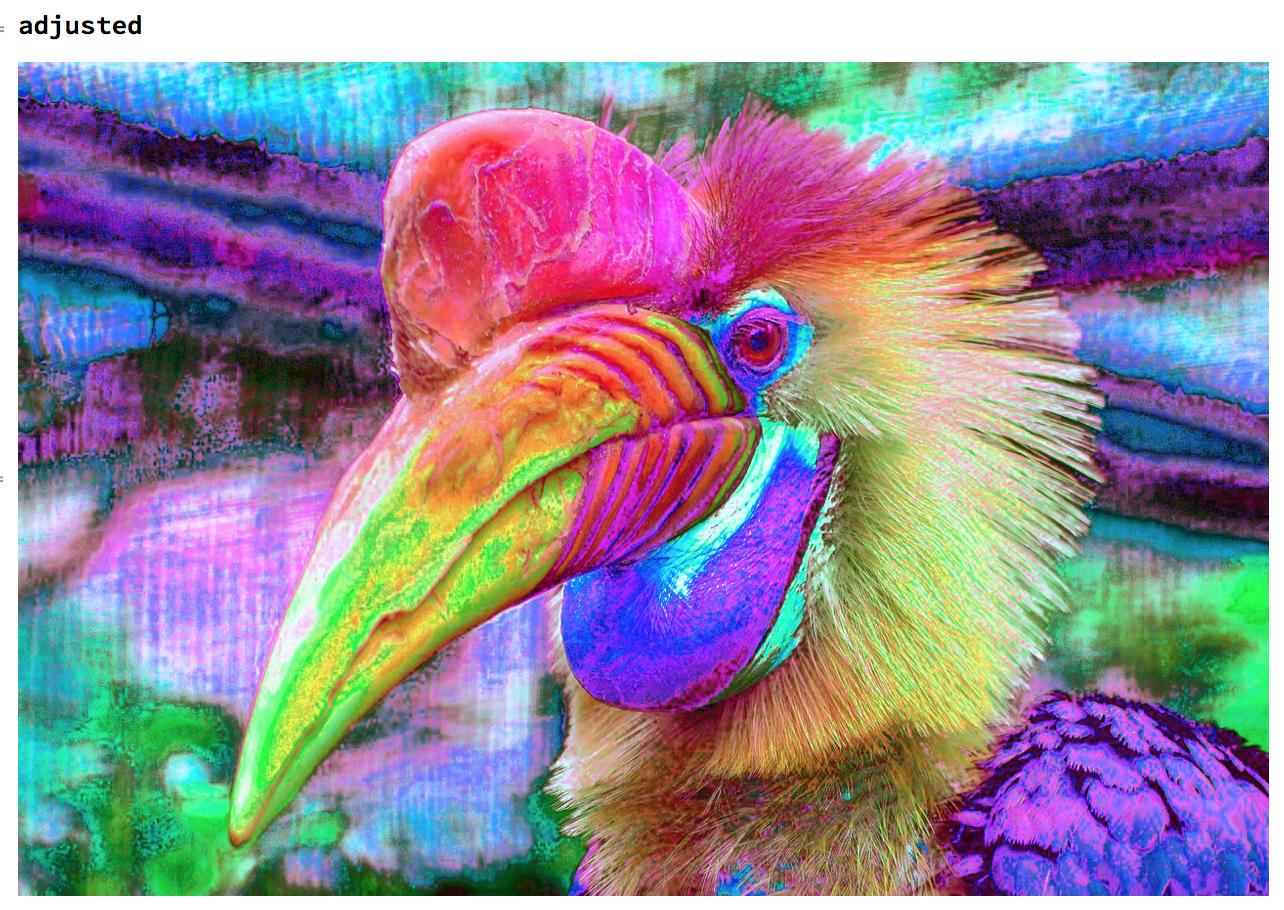
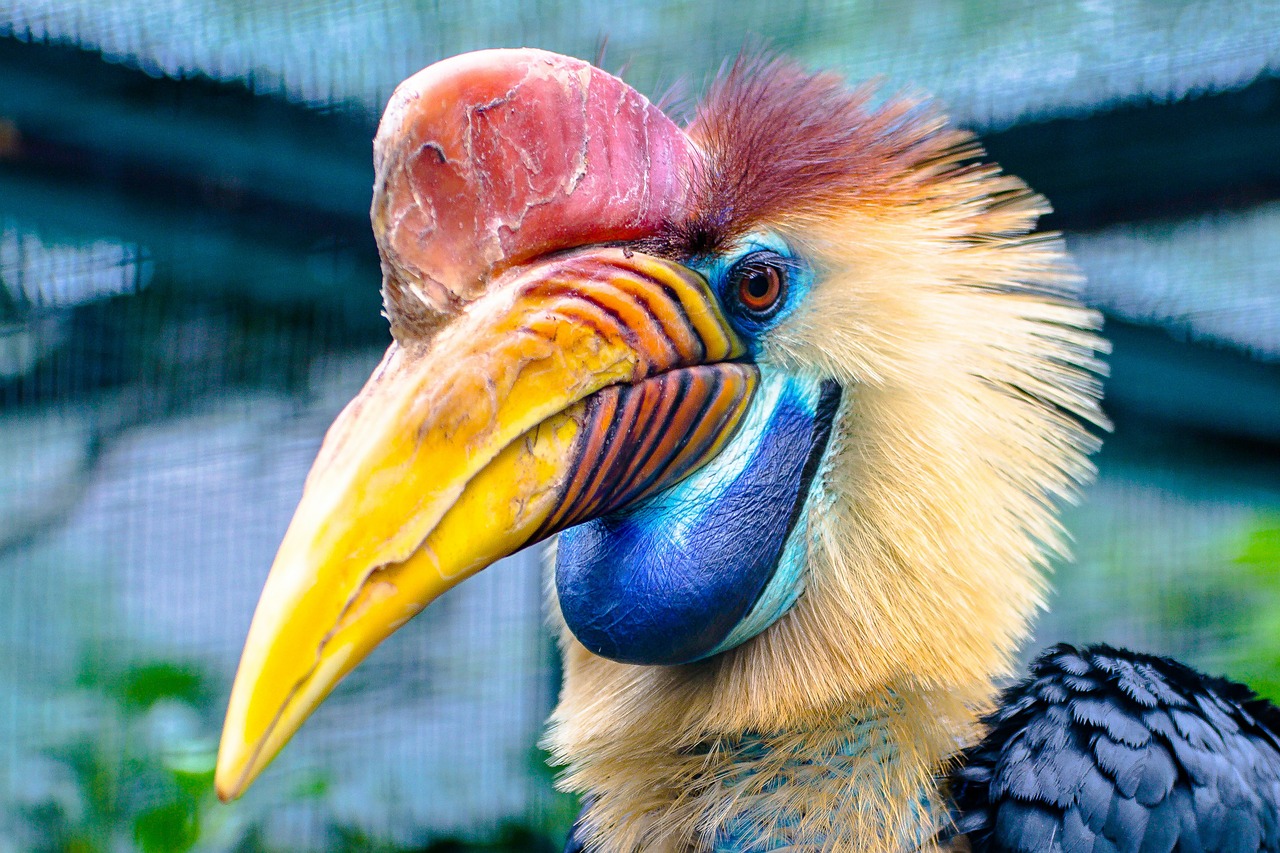
Meet a colorful character, Mr. Helmet Hornbill:
Mr. Hornbill is likely pleased with how his pictures get adjusted day after day. Ah... artistically pleasant photo retouching. Well, sure, but not today, Mr. Hornbill.
This picture of Mr. Hornbill was already stretched so its Red, Green and Blue color values range from 0 to 1. Or maybe Mr. Hornbill did not need anything like that, because maybe he is naturally stretched:
img = Import@"https://cdn.pixabay.com/photo/2013/08/23/14/17/animal-175033_1280.jpg";
In[222]:= ImageMeasurements[img, {"Min", "Max"}]

Out[222]= {{0., 0., 0.}, {1., 1., 1.}}
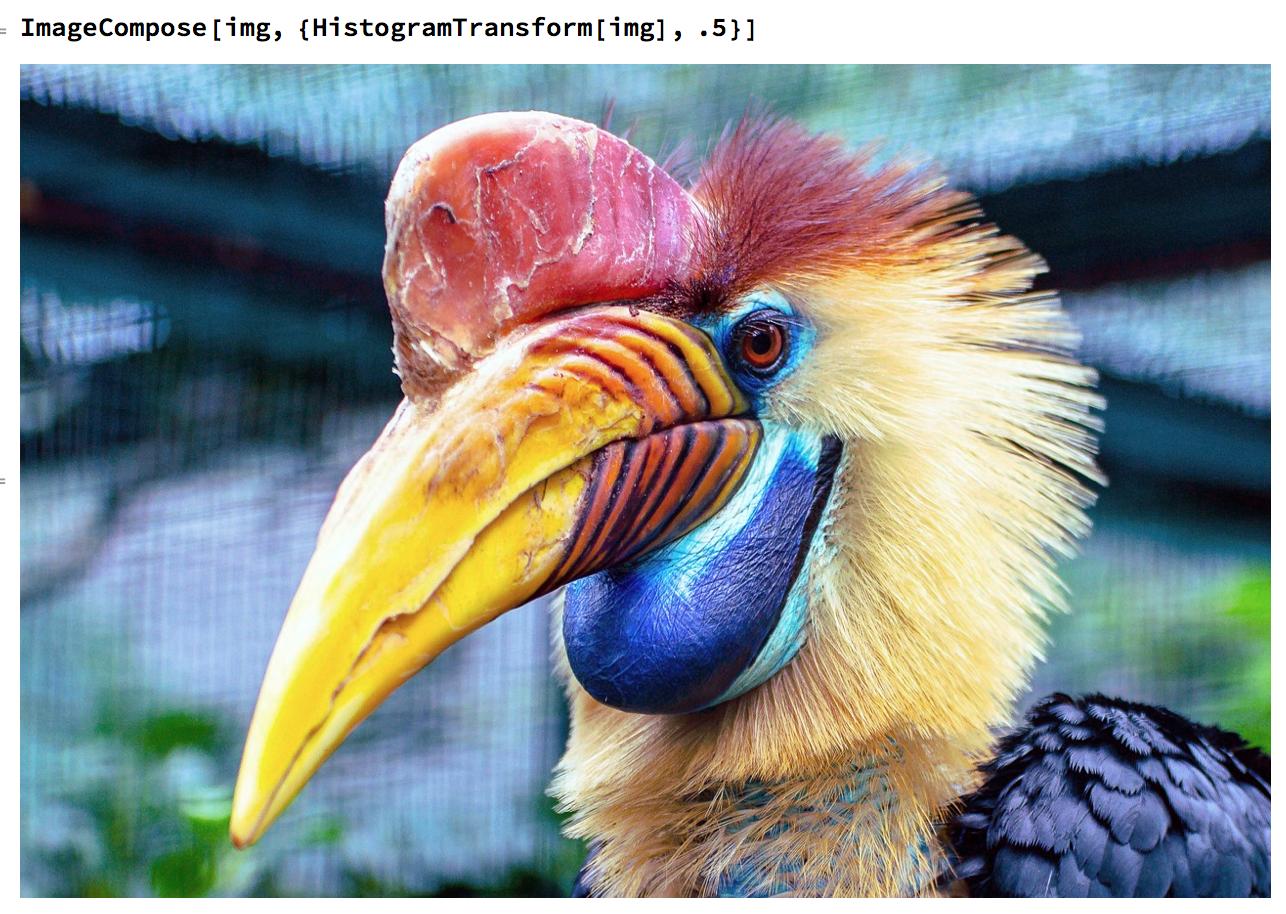
Anyhow, things get nicer and sharper for Mr. Hornbill before they get worse. A composition of itself with its flattened channel version looks flattering:
ImageCompose[img, {HistogramTransform[img], .5}]
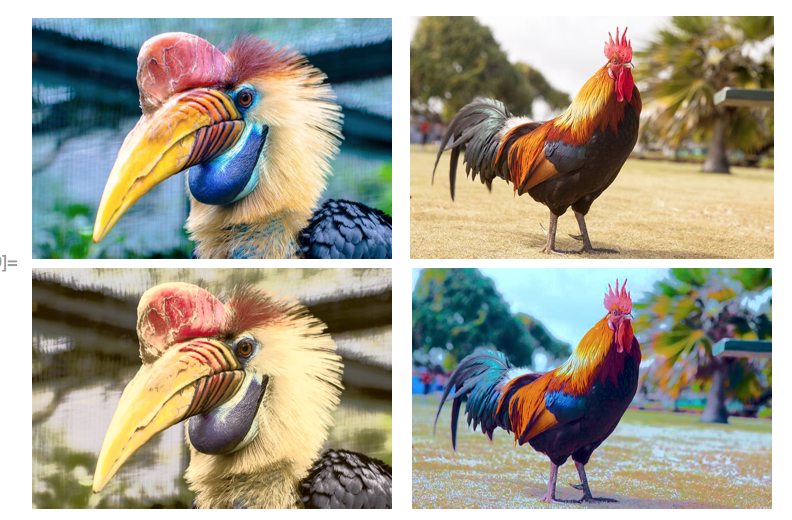
Switching colors with a rooster by transferring color distributions channel by channel: Not so nice. (Images' backgrounds contribute to the distributions.)
HistogramTransform[ColorConvert[img, "LAB"], ColorConvert[rooster, "LAB"]]
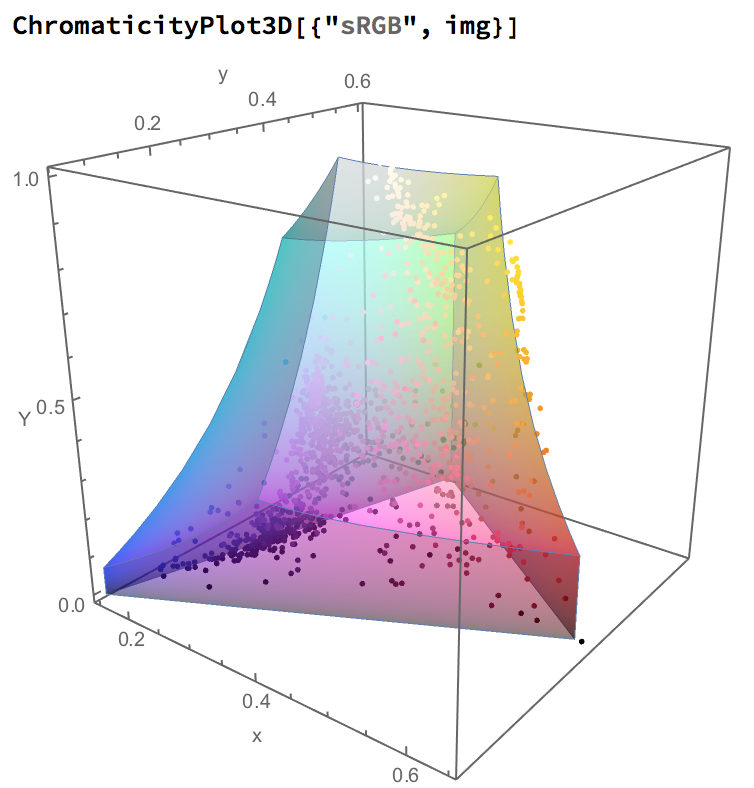
And now... Mr. Hornbill will serve my purpose of demonstrating how to change the 3D distribution of its colors in the Lab space. The target 3D distribution? A non-pleasing one: the sRGB colorspace gamut, treated as if all its colors are equiprobable. This is where we start. In the final image, colors will spread the entire volume (sRGB gamut) uniformly.
ChromaticityPlot3D[{"sRGB", img}]
How can I do that to Mr. Hornbill? Step by step. Like a sculptor, I reshape the color distribution in each of the 3D dimensions, then rotate randomly the distribution and reshape again. And again, until convergence. Mr. Hornbill might say is a victim of a multidimensional PDF transfer by iteratively reshaping random marginal histograms.
Before that, I hack my way to define a 3D, empirical, uniform distribution for the sRGB gamut. Once I grabbed points on the 6 "faces" of the gamut, I compute the convex hull, then sample on a grid the 3D space around the convex hull so as to only retain these 3D points inside the convex hull.
c = ChromaticityPlot3D["sRGB", "LAB"];
points3D = c[[1, 1, All, 1]];
chm = ConvexHullMesh[Flatten[points3D, 1]];
ptsinside = {};
mf = RegionMember[chm];
Do[
  If[mf[{l, a, b}],
       AppendTo[ptsinside, {l, a, b}]
   ],
  Evaluate[Sequence @@ pspec]
  ];
This gives about 62 thousands points. And now, the iterative sculpting:
multidimensionalReshape[source_, ref_, \[Epsilon]_: 10^-10, maxiterations_: 200] :=
  FixedPoint[
   With[{R = randomRotationMatrix[Length[source]]},
     Transpose[R].HistogramTransform[R.#, R.ref]] &,
   source, maxiterations,
   SameTest -> (RootMeanSquare[Norm /@ Transpose[#1 - #2]] < \[Epsilon] &)];

randomRotationMatrix[n_] :=
  If[Det@# == 1, #, randomRotationMatrix[n]] &[
   Transpose@#.DiagonalMatrix[Sign@Diagonal@#2] & @@
    QRDecomposition@RandomReal[NormalDistribution[], {n, n}]];

pix = Flatten /@ ImageData[ColorConvert[img, "LAB"], Interleaving -> False];
new = multidimensionalReshape[pix, Transpose@ptsinside];
adjusted = Image[Partition[#, First@ImageDimensions@img] & /@ new, Interleaving -> False, ColorSpace -> "LAB"];
The result looks quite good enough, pixels are spread all around inside the volume. I.e. we sculpted the initial convex hull into the shape of the sRGB gamut. 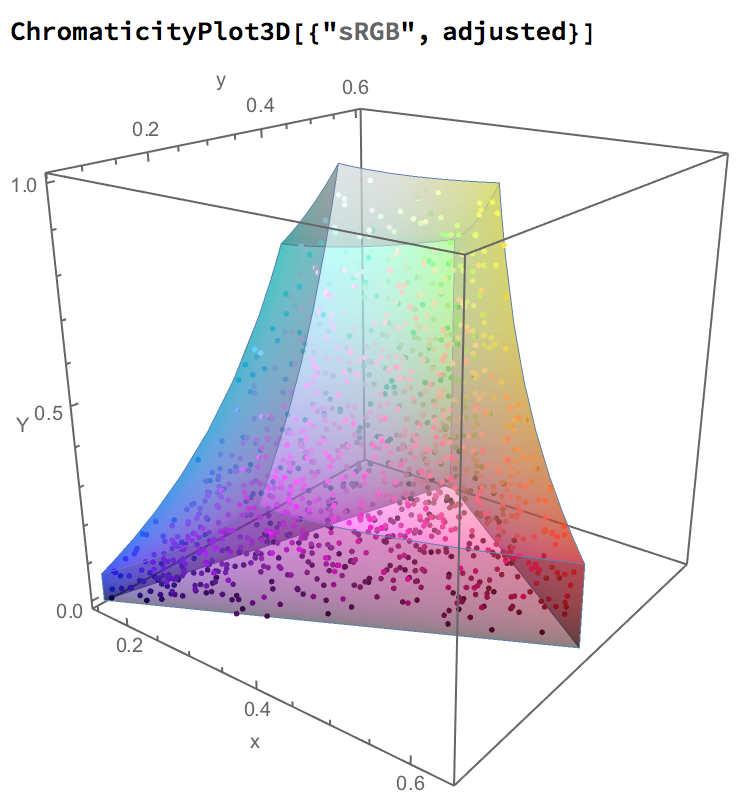
Mr. Hornbill stays cool under his new colors: