
Abstract
My project is a microsite on the Wolfram Cloud. One can upload an image that is offset by 0, 90, 180, or 270 degrees and have it rotated back to its upright orientation. The project implements a neural network which trained the program and makes the correction as accurate as possible. The data used includes about 130,000 images for training, and the program is about 90 percent accurate. HTML was also used to create a "results" page that is both visually appealing and similar to the upload page. In the future, I hope to train more data to allow the program to correct images in smaller increments and to add more functionality for doing things with the pictures (e.g. editing them).
Downloading Images
The first challenge was downloading the images. I chose to use Flickr where I could choose random categories and download many pictures at the same time. To ensure that the program would be as accurate as possible, I gathered 130,000 images.
I first had to connect to my Flickr account, which allowed Mathematica to access the website and search for images.
flickr = ServiceConnect["Flickr"]
The code below, when run consecutively, gathers the images.
pics = ServiceExecute["Flickr",
      "ImageSearch", {"Keywords" -> {#}, "Elements" -> {"Data"}}] & /@ {"image", "search", "categories"};

allkeys := Flatten[Normal /@ pics][[All, "Keys"]];

pictures := Function[{key},
    ServiceExecute["Flickr", "ImportImage", {"Keys" -> key, "ImageSize" -> "Medium"}]] /@ allkeys;

export = Export[
          FileNameJoin[{NotebookDirectory[], "ImagesWC", "picture" <>
        ToString[#[[2]]] <> ".png"}], #[[1]]] & /@
      MapThread[List, {pictures, Range[Length[pictures]]}];
The code within the variable "pics" that says {"image", "search", "categories"} can be changed to alter the keywords for the searches on Flickr. Each search keyword returns 30 images, and my computer, a MacBook Pro from 2015, could successfully run the code with about 30 keywords at a time. Furthermore, within the variable export, the code "ImagesWC" refers to the folder that the downloaded images were saved in, and the code "picture" refers to the name of the downloaded pictures (e.g. the first picture would be picture1.png, the second would be picture2.png, etc.). It is essential to change this name each time the code is run as not doing so would simply cause previously downloaded images to be replaced.
Importing Images
directory = FileNameJoin[{NotebookDirectory[], "ImagesWC"}];
files = FileNames["*.png", directory];
resize = 100;

createImage[img_Image] :=
  Module[{size, cropped, crop, angle, rotated},
   size = Min[ImageDimensions[img]];
   cropped = ImageCrop[img, {size, size}];
   crop = N[Sqrt[(size - 1)^2 + (size - 1)^2]/2];
   angle =
    RandomChoice[{0 Degree, 90 Degree, 180 Degree,
      270 Degree}];
   rotated = ImageRotate[cropped, angle];
   ImageResize[ImageCrop[rotated, {crop, crop}], resize] -> -angle
   ];

  trainingData= Cases[
     Table[
      createImage[Import[file]], {file, files}],
     HoldPattern[_Image -> _]
     ];
   DumpSave["trainingData.mx", trainingData];
This code refers to the directory where the images were stored and the type of file ".png" that they were. It then prepares them for training through createImage, cropping and resizing them to make them easier to train and giving them a pseudorandomly chosen angle of 0, 90, 180, or 270 degrees. Next, they are imported to the notebook and stored in trainingData, which is saved so that the images don't have to be re-imported (the function to get them back would be Get["trainingData.mx"]).
Training the Neural Network
For my neural network, I used Wolfram's already made ImageIdentify Net because identifying images is very similar to what my project does. I kept the first 23 lines of the net, which were all part of the NetChain. I then removed the output and changed it to a vector size of four one vector for each of the four possible angles. Here is an image of the trained neural network:
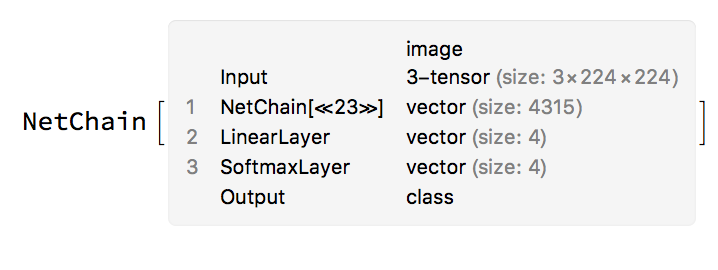
Image Preprocessing Functions
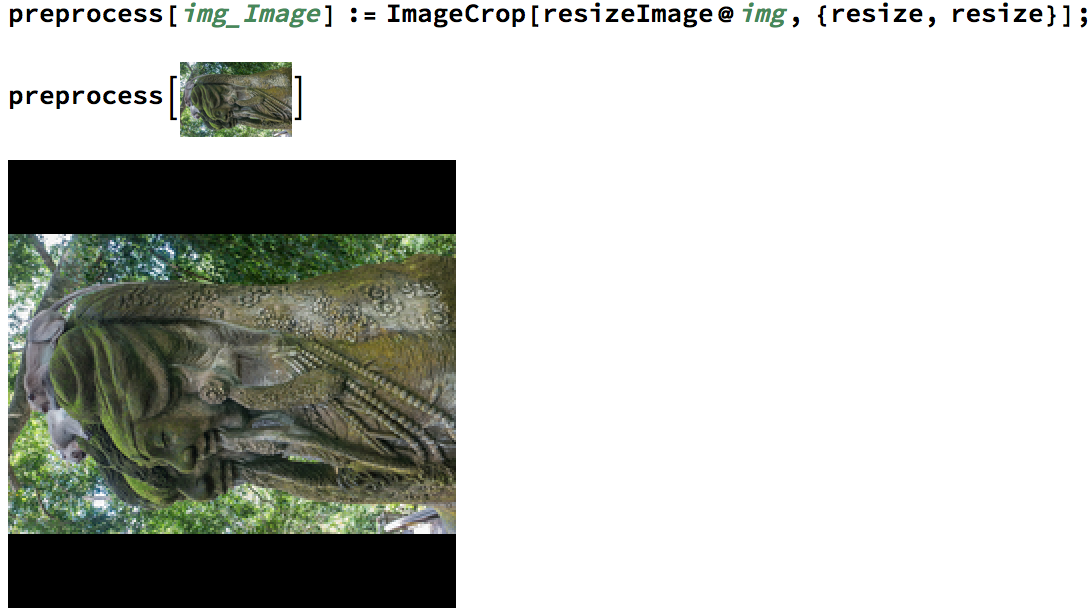
First, the inputted image is resized so that the largest dimension is 224 pixels, but the aspect ratio is not altered. This is done with this function: 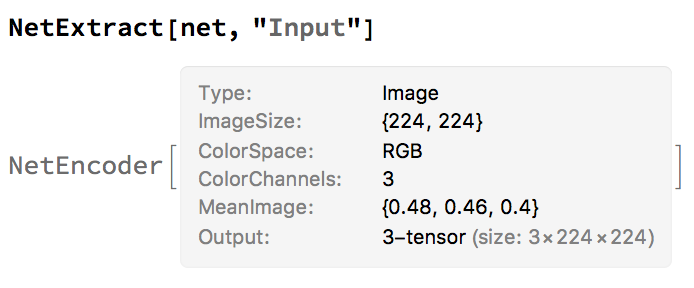
It was then important to edit the images to make them squares as the neural network was trained on square images. However, actually cropping the images and getting rid of parts of the picture caused the program to lose valuable data in determining the angle of the image, so the images were instead padded to receive the same result:
Classifying the Images
Applying the net to a preprocessed image gives a classification:
classify[img_] := net[preprocess[img]];
This classification can be 0, 1, 2, or 3 where 0 is equivalent to 0 degrees, 1 is equivalent to 90 degrees, 2 is equivalent to 180 degrees, and 3 is equivalent to 270 degrees.
Based on the classification, an image can then be rotated with this function:
rotateImage[img_Image, rotation_Integer] :=
  ImageRotate[img, Pi rotation /2];
The rotation is the opposite of the classification of an image:
-classify[example_image]
Rotation Correction Function
Below is the function used to auto rotate a given image. I placed many of the previous functions within autoRotateCloud[i_] to eliminate any confusion and to allow the function to run as quickly as possible. Furthermore, the HTML is used to customize the website and make it as visually appealing as possible.
autoRotateCloud[i_] := Module[{image = i},
  cropImage = ImageCrop[resizeImage@image, {resize, resize}];
  nnetRes =
   CloudEvaluate[
    With[{n = Import["rotatenet.wlnet"]}, n[cropImage]]];
  img = ImageRotate[image, Pi*(-nnetRes)/2];
  imgUrl = CloudExport[img, "PNG", "Permissions" -> "Public"][[1]];
  ExportHTML["
    <head>
        <title>
          Image Rotation Correction - Results
        </title>
        <meta charset=\"utf-8\">
        <meta http-equiv=\"X-UA-Compatible\" content=\"IE=edge\">
        <meta name=\"viewport\" content=\"width=device-width, \
initial-scale=1\">
        <link href=\"/res/themes/css/red.min.css\" type=\"text/css\" \
rel=\"stylesheet\">
      <style type=\"text/css\">
    :root #content > #right > .dose > .dosesingle,
    :root #content > #center > .dose > .dosesingle
    { display: none !important; }</style>
    </head>
    <body class=\"body-default    has-wolfram-branding\" \
data-gr-c-s-loaded=\"true\">
        <div class=\"site-wrapper\">
          <div class=\"site-wrapper-inner\"> <div id=\"content\" \
class=\"container container-main\">
                <div class=\"has-feedback form-default\" \
enctype=\"multipart/form-data\" autocomplete=\"off\" \
data-image-formatting-width=\"true\">
            <div class=\"panel panel-default panel-main panel-form\">
              <div class=\"panel-body\">
                <div class=\"form-object form-horizontal\">
    <h2 class=\"section form-title\">Your Rotated Image</h2>
    <p class=\"text form-description\">Click on the image or button \
to download.</p>
    <a href='" <> imgUrl <>
    "' download><img style='max-width:100%' src='" <> imgUrl <>
    "' /></a>
    <div style=\"width: 0; height: 0; overflow: \
hidden;\"></div></div>
              </div>
                <div class=\"panel-footer text-right\">
               <a href='" <> imgUrl <> "' download>
                  <button class='btn btn-primary'>
                    Download
                  </button>
               </a>
                </div>
            </div>
          </div></div>
          </div> <!-- site-wrapper-inne -->
        </div> <!-- site-wrapper -->
    <div class=\"wolfram-branding dropup\">            <a \
class=\"wolfram-branding-cloud\" href=\"http://www.wolfram.com/cloud/\
\" style='color:white' target=\"_blank\" data-toggle=\"dropdown\" \
data-=\"\"></a>            <ul class=\"wolfram-branding-menu \
dropdown-menu\">                <div \
class=\"wolfram-branding-menu-body\">                <!-- Dropdown \
menu links -->                <a \
class=\"wolfram-branding-link-primary\" target=\"_blank\" \
href=\"http://www.wolfram.com/cloud/\">About Wolfram Cloud »</a>      \
          <a class=\"wolfram-branding-link-secondary\" \
target=\"_blank\" \
href=\"http://www.wolfram.com/legal/terms/wolfram-cloud.html\">Terms \
of use »</a>                <a \
class=\"wolfram-branding-link-secondary\" target=\"_blank\" \
href=\"http://www.wolfram.com/knowledgebase/source-information/\">\
Data source information »</a>                </div>            </ul>  \
      </div></body>
    "]]
Creating the Microsite
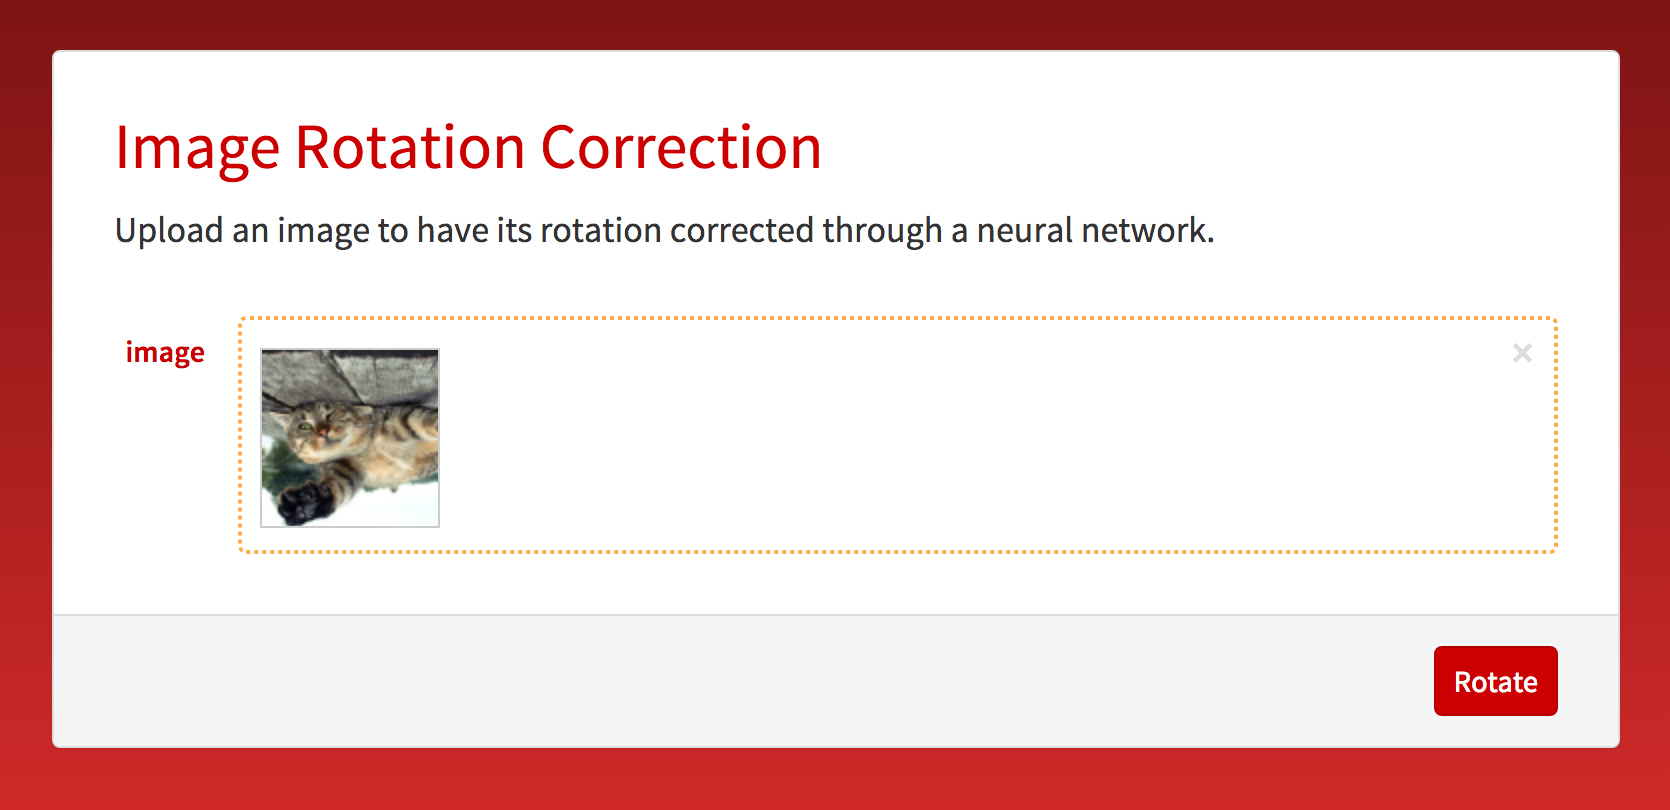
Creating the Microsite was the final step of my project. By simply writing a FormFunction that implements my autoRotateCloud[i_] function and slightly changes the design of the site, I was able to deploy the form to the cloud and create a publicly accessible website:
form = FormFunction[{"image" -> "Image"},
   autoRotateCloud[#image] &,
   AppearanceRules -> <|"Title" -> "Image Rotation Correction",
     "Description" ->
      "Upload an image to have its rotation corrected through a \
neural network.", "SubmitLabel" -> "Rotate"|>, PageTheme -> "Red"];

CloudDeploy[form, "Image-Rotation-Correction-by-Pierce-Forte",
 "Permissions" -> "Public"]
Here are two images of the microsite, one of the submission page and one of the results page:


Examples
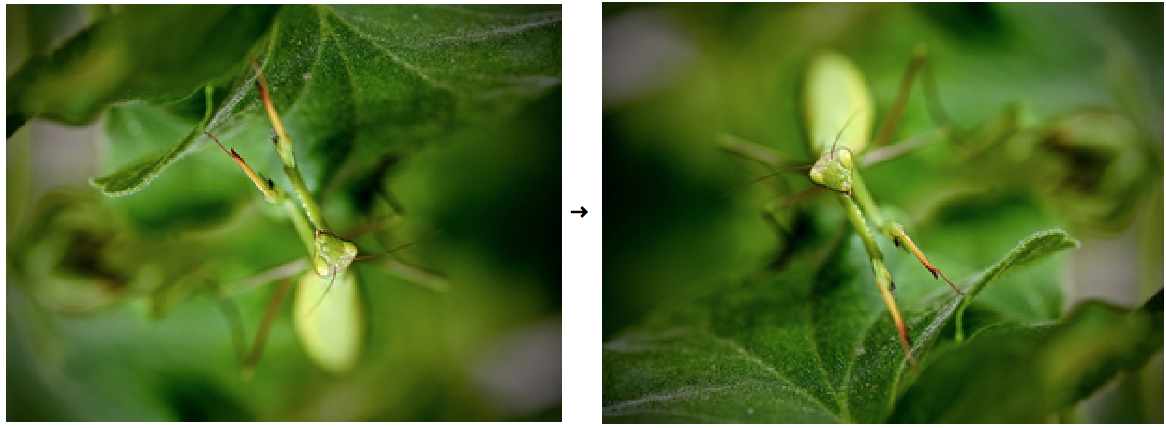
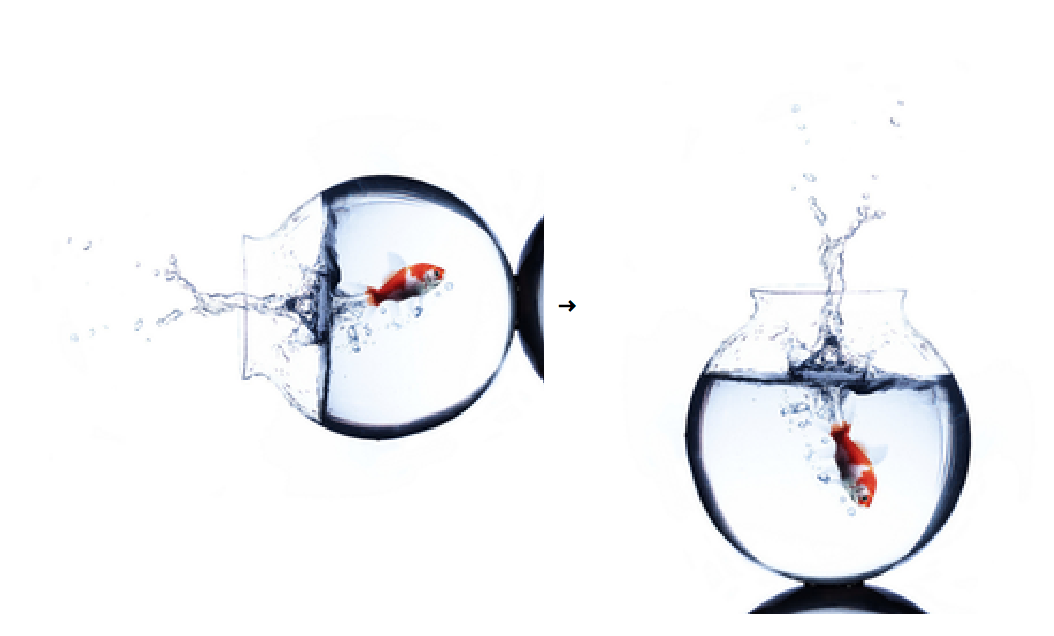
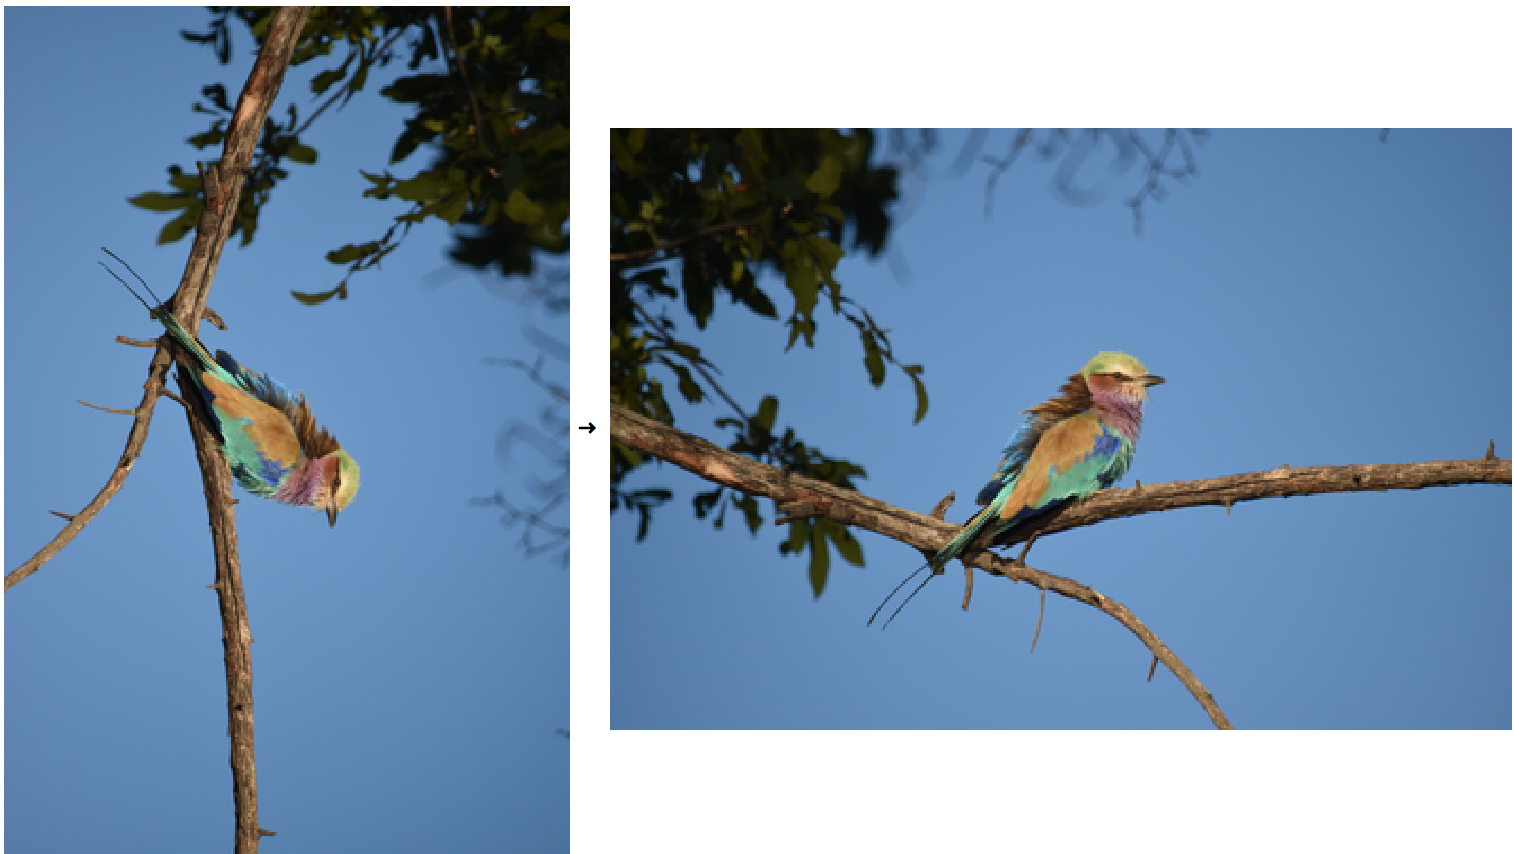
Below are some examples of images that the program has accurately rotated:
Future Additions and Changes
In the future, I hope to further enhance the usability of my microsite and to add new features. Currently, my main goal is to train a network that would allow the program to make rotation corrections in smaller increments. This would mean that the program would first rotate the image 0, 90, 180, or 270 degrees, and it would then rotate it at an angle within 0 and 90 degrees.
Furthermore, I hope to add more image editing features which would allow a user to crop or fill in any lost space. This feature will be particularly helpful if I create the network for rotating images in smaller increments as such rotations often leaves black space around the pictures.
Other less noticeable additions might include an option for the user to provide feedback, which could be used to further train the neural network and address any issues, as well as adding code to receive metadata about the microsite.