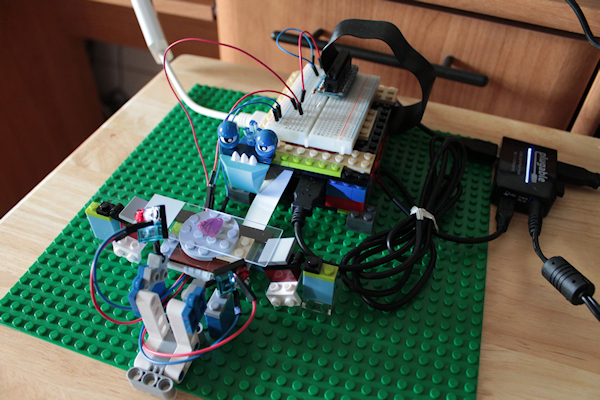
Lately I've been inspired by several posts around the internet describing how the lens from a laser pointer can be used as a macro lens for smartphone cameras. I endeavored to create a simple home-built microscope using a RPi, some Legos and Mathematica to control the instrument.

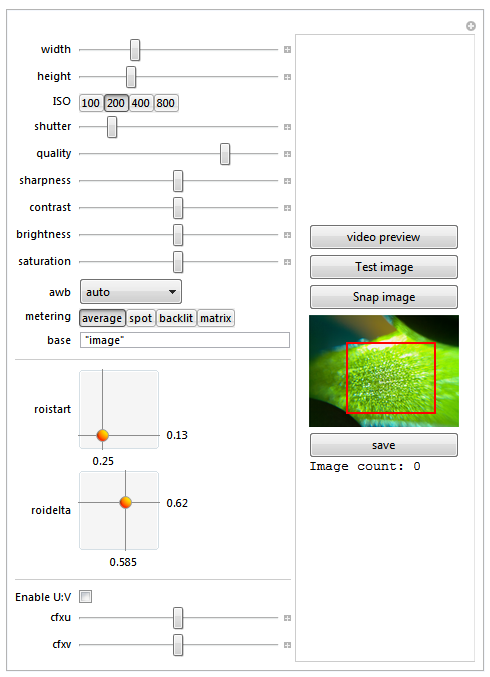
Presently, I am using Mathematica as a front end to raspistill to make it easy to quickly adjust arguments, initiate the video preview, append auto-incrementing numbers to the filenames so I don't overwrite images, and determine visually the appropriate values to send to the region of interest (-roi) option. Here's the code I'm using:
Manipulate[
    Column[{
      Button["video preview",
       << "!lxterminal --geometry=5x5 -e \"raspivid -t 300000 -p 10,10,600,400\""
        ],
        Button["Test image", img = Import["!raspistill -n -t 5 -w 800 -h 600  -o -", "JPG"]],
        Button["Snap image", img = Import[StringJoin["!raspistill -n -t 5", Sequence @@ {
         " -w ", ToString@width,
         " -h ", ToString@height,
          " -ISO ", ToString@ISO,
          " -ss ", ToString@(shutter*1000),
          " -q ", ToString@quality,
          " -sh ", ToString@sharpness,
          " -co ", ToString@contrast,
          " -br ", ToString@brightness,
          " -sa ", ToString@saturation,
          " -awb ", awb,
          " -mm ", metering,
          If[cfxenable," -cfx "<>ToString@cfxu<>":"<>ToString@cfxv,""],
          " -roi ", StringReplace[ToString[Flatten[{roistart[[1]],1-roistart[[2]]-roidelta[[2]],roidelta}]],
           {" "->"", "{"->"", "}"->""}]
          },  " -o -"], "JPG"];],
        Dynamic@Show[Thumbnail@img,Epilog ->
           {EdgeForm[{Thick,Red}], FaceForm[None],
           Rectangle[Scaled@roistart, Scaled@(roistart+roidelta)]}],
        Button["save",
           Export[base <> ToString@cnt <> ".jpg", img, "JPG",
             "CompressionLevel" -> 0.01]; cnt += 1;],
        Row[{"Image count: ",cnt-1}]
    }],

    {{width, 800}, 200, 2400, 1},
    {{height, 600}, 200, 1800, 1},
    {{ISO, 200}, {100, 200, 400, 800}},
    {{shutter, 50}, 10,275,1},
    {{quality, 75}, 1, 100, 1},
    {{sharpness, 0}, -100, 100, 1},
    {{contrast, 0}, -100, 100, 1},
    {{brightness, 50}, 0, 100, 1},
    {{saturation, 0}, -100, 100, 1},
    {{awb,"auto"},{"auto",
       "sun","cloud","shade","tungsten","fluorescent","incandescent","flash","horizon"}},
    {{metering, "average"},{"average","spot","backlit","matrix"}},
    {{base,"image"}},
    Delimiter,
    {{roistart,{0,0}},{0,0},{1,1},Appearance->"Labeled"},{{roidelta,{1,1}},{0,0},{1,1},Appearance->"Labeled"},
    Delimiter,
    {{cfxenable,False,"Enable U:V"},{True,False}},
    {{cfxu,128},0,255,1},
    {{cfxv,128},0,255,1},
    ContinuousAction->False,
    Initialization :> (
        img = Image@Rasterize@"no image";
        cnt = 1;
        )
    TrackedSymbols:>{roistart, roidelta}
 ]

Right now, it's clunky and I think I'm running in to some memory issues. On occasion, Mathematica does not seem to get any input from <<"!raspistill ... " despite the camera working. I haven't been able to do much debugging yet, but the code above should be useable by anyone with a RPi and the camera (it's not dependent on the microscope aspect of the project). I'd be interested in hearing comments about how one might improve the code. Given Mathematica's image-manipulation capabilities, I think this is a useful platform upon which to build a digital imaging device.
If you are interested in the instrument design and some sample photos, I have a more detailed description of the project at my website.