Before beginning this section, be sure that you've read through my first post. Much of the code used there will be reused here.
Creating an Android Application That Uses the Wolfram Cloud
In this section, we will expand on the first tutorial by showing how to create and use APIFunctions that use multiple inputs, do basic error checking, and how to receive images as inputs in the Android app. To do this, we will create a sample app that will display a basic cellular automaton pattern given a rule and number of steps. If you are unfamiliar with cellular automaton, you can read more about them here. The source code for this project, along with a Mathematica Notebook containing the API Function, can be downloaded from here.
Creating the API Function
This API Function, like in the first tutorial, will contain 3 parts: the input, a pure function, and an output. This time, however, we are using 2 inputs rather than one. To do this, create 2 associations separated by a comma. The pure function will also be larger than last time, as we will also do some basic error checking to ensure reasonable input is given. Since the basic cellular automaton we are dealing with can only be defined by 256 rules, we will use and If function to check that the "rule" input is not less than 0 or greater than 255. If the API sees this input, it will return an error message. Either way, we will give the output as a PNG image.
api = APIFunction[
   {"rule" -> "Number", "steps" -> "Number"},
   If[
     Or[#rule < 0, #rule > 255],
     Style[Framed["(Invalid Rule #)", ImageMargins -> 0], 45, Red],
     ArrayPlot[CellularAutomaton[#rule, {{1}, 0}, #steps]]
     ]&,
   "PNG"
   ];
This APIFunction can be deployed with a specific name and file path, so that the deployed function will appear in a specific place within your personal Wolfram Cloud file directory using a CloudObject:
obj=CloudObject["Samples/CellularAutomaton"];
CloudDeploy[api, obj, Permissions->"Public"]
This will output a link to the deployed API form, just as before:
https://www.wolframcloud.com/objects/user-4d6d3309-8894-48e9-b3bd-c49322e869c9/Samples/CellularAutomaton
Notice that in the middle of the URL is the word "user" followed by an alphanumeric signifier unique to every Wolfram Cloud account. If you were to deploy this API function yourself, that portion of the URL would be different.
With the API function complete and deployed, let's create the Android application.
Making the Android Application
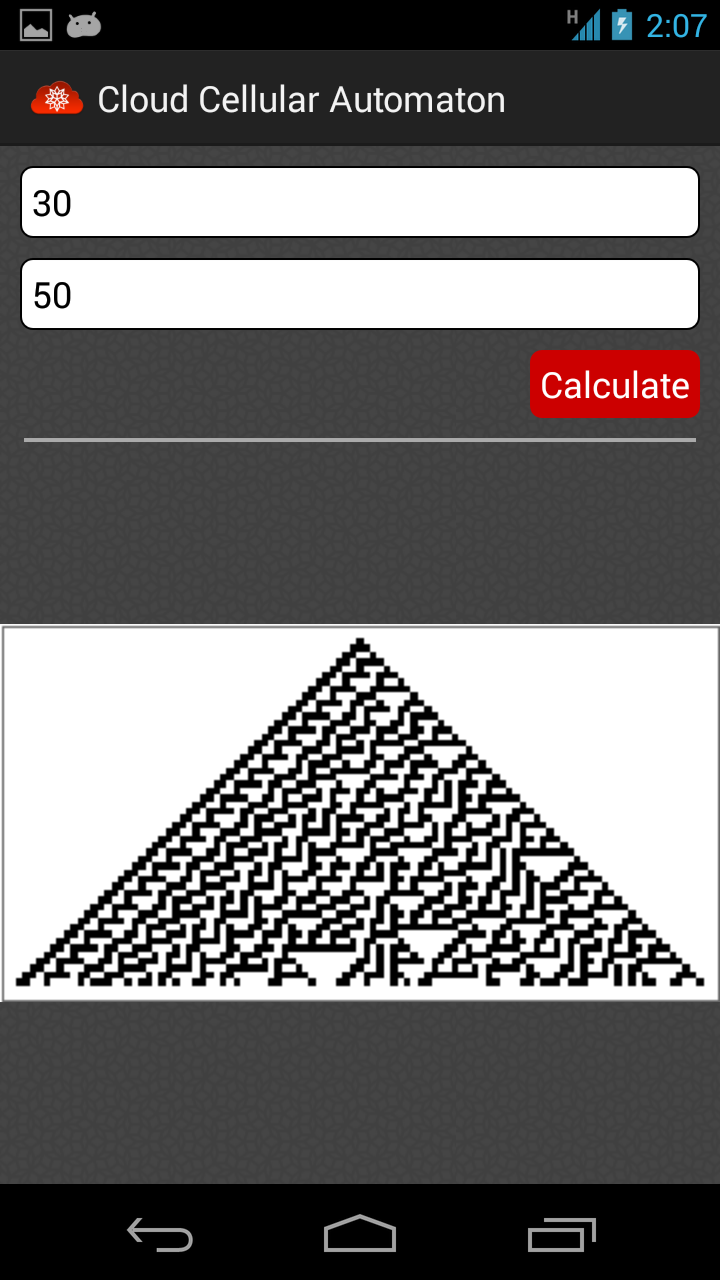
In order to work with this new API function, a few changes have to be made. First, we must give the user a way to give 2 different inputs:

The other change that must be made is to specify that the Android app is expecting to get back an image rather than text. First, let's look at CloudInterface:
public interface CloudInterface {
    public void onEvaluateCompleted(Bitmap result);
    public String getBaseURL();
}
The only difference here is that the parameter in onEvaluateCompleted changed from String to Bitmap. This change must be reflected in MainActivity, but we will see that later. First, let's look at CloudCompute.
This method is actually a bit shorter than it was when receiving a string. This is because Android has a built-in BitmapFactory class that handles images very cleanly. First, this Cloud Compute class takes an int array rather than a single Double object. The URL string is constructed by using "?rule=", similar to before. Since there is a second input, we must also include "&steps=" to designate the second input being used. Exactly as before, a URL object is created using the URL string. Rather than creating a BufferedReader to read the input stream from the URL, however, we use the BitmapFactory mentioned previously. Then, we use onPostExecute to pass the resulting Bitmap back to MainActivity.
public class CloudCompute extends AsyncTask<int[], Void, Bitmap> {
    private String baseURL = "";
    private CloudInterface callback;

    public CloudCompute(Context c) {
       this.callback = (CloudInterface) c;
       baseURL = callback.getBaseURL();
    }

    @Override
    protected Bitmap doInBackground(int[]... params) {
       int rule, steps;
       Bitmap bitmap = null;

       for (int[] pair : params) {
         try {
          rule = pair[0];
          steps = pair[1];

          baseURL = baseURL + "?rule=" + rule + "&steps=" + steps;

          URL url = new URL(baseURL);

          bitmap = BitmapFactory.decodeStream(url.openStream());

         } catch (Exception e) {
          e.printStackTrace();
         }
       }
       return bitmap;
    }

    @Override
    protected void onPostExecute(Bitmap result) {
       callback.onEvaluateCompleted(result);
    }
}
In the MainActivity class, fewer changed are required. First, 2 EditText fields are required to get both of the inputs. The ints parsed from these fields are put into an array to give to Cloud Compute. Last, in the onPostExecuted method, we use setImageBitmap to display the output instead of setText.
public class MainActivity extends Activity implements CloudInterface {
    private EditText prompt1, prompt2;
    private ProgressBar bar;
    private ImageView imageView;

    private String baseURL = "https://www.wolframcloud.com/objects/user-4d6d3309-8894-48e9-b3bd-c49322e869c9/Samples/CellularAutomaton";

    @Override
    protected void onCreate(Bundle savedInstanceState) {
       super.onCreate(savedInstanceState);
       setContentView(R.layout.activity_main);

       prompt1 = (EditText) findViewById(R.id.prompt1);
       prompt2 = (EditText) findViewById(R.id.prompt2);
       bar = (ProgressBar) findViewById(R.id.progressBar);
       imageView = (ImageView) findViewById(R.id.image);
    }

    public void buttonClick(View v) {
       bar.setVisibility(View.VISIBLE);

       imageView.setImageResource(android.R.color.transparent);

       InputMethodManager imm = (InputMethodManager) getSystemService(Context.INPUT_METHOD_SERVICE);
       imm.hideSoftInputFromWindow(prompt2.getWindowToken(), 0);

       int rule = Integer.parseInt(prompt1.getText().toString());
       int steps = Integer.parseInt(prompt2.getText().toString());

       CloudCompute cc = new CloudCompute(this);

       int[] pair = { rule, steps };

       cc.execute(pair);
    }

    @Override
    public void onEvaluateCompleted(Bitmap result) {
       bar.setVisibility(View.GONE);
      imageView.setImageBitmap(result);
    }

    @Override
    public String getBaseURL() {
       return baseURL;
    }
}
With these changes made, the app is ready to be used. If you want to see this app in action, we've uploaded a short video of it to YouTube. And again, the code for this app can be downloaded from here.