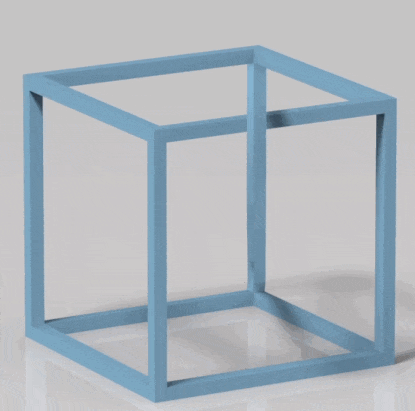
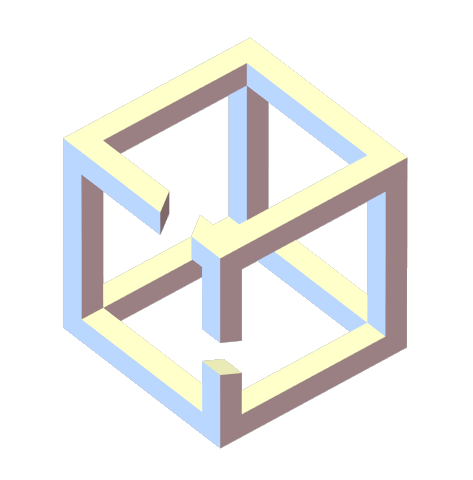
Imagine you would like to 3D print an impossible cube of M.C. Escher, how would you do this? Take a look at the image below, but don't scroll down yet to see how it is made. It is real 3D graphics built upon only possible geometries, so there should be a trick to it. Try to notice some details that will give it out. The image is not perfectly constructed, so look for betraying inconsistencies.
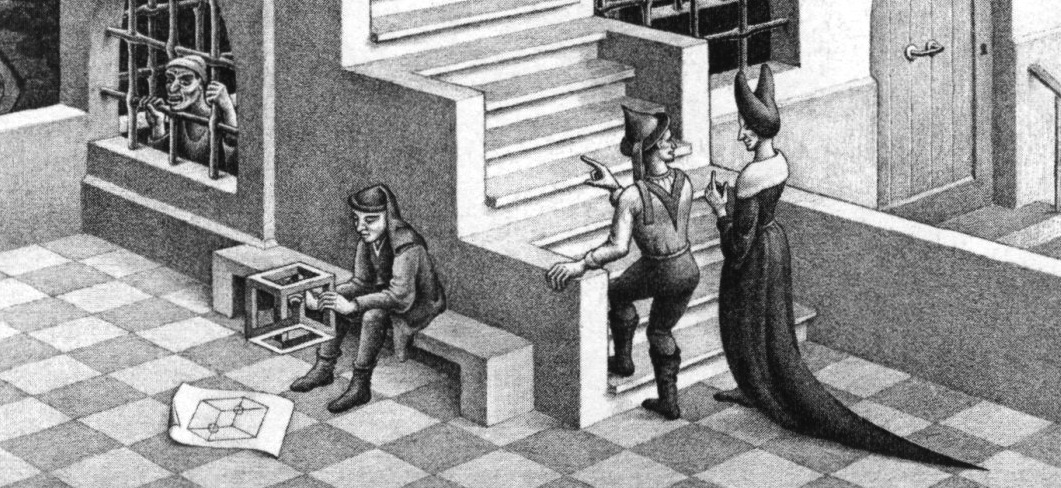
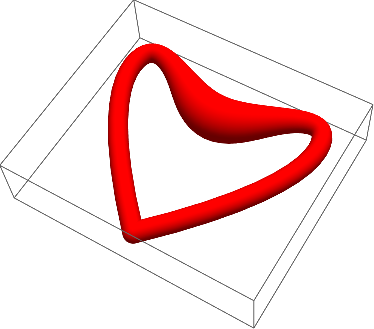
The cube was invented by M.C. Escher for Belvedere, a lithograph in which a boy seated at the foot of the building holds an impossible cube (below is a fragment). The impossible cube draws upon the ambiguity present in a Necker cube illustration; an impossible cube is usually rendered as a Necker cube in which the edges are apparently solid beams.
Designing a good optical illusion requires polishing little things. In this particular method of constructing one would need to know a bit about:
- plane curves in 3D space
- varying thickness of a spline
- controlling the reflection of light
There are alternative ways to construct it, for instance, cutting the edges:
but here I will follow a different trick illustrated below, which I saw originally in Pierpaolo Andraghetti's video.

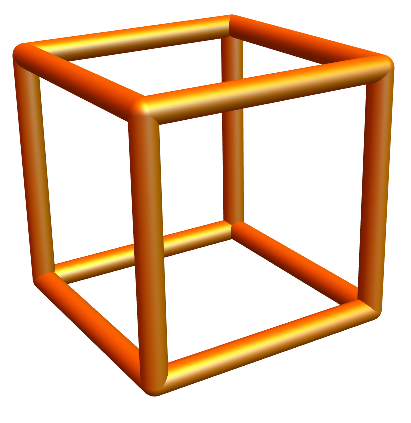
I start from simply drawing a cube from built-in data:
v = PolyhedronData["Cube", "VertexCoordinates"];
i = PolyhedronData["Cube", "EdgeIndices"];
Graphics3D[{Orange, Specularity[White, 20], GraphicsComplex[2 v, Tube[i, .1]]}, Boxed -> False]
We used Tube and Specularity, which greatly increase 3D depth perception, especially for seemingly crossing edges. To replace a cube's edge with a illusion-curve I need an easy way to make it. I suggest making a very simple 2D spline:
pts = {{-1, -1}, {2.5, -2}, {2.5, -1}, {-1, 1}};
Graphics[{
  {PointSize[.1], Red, Point[{1, -1}]},
  {BSplineCurve[pts], Green, Line[pts], Red, Point[pts]}}, Frame -> True]
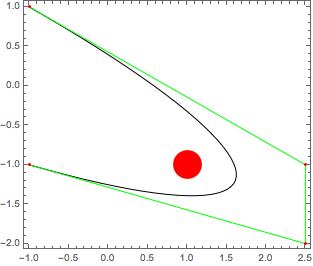
which as you can see "hugs" the red dot, - a mark for $(-1,1)$ coordinate. This visually guarantees the curve extends well enough beyond other perpendicular edge to create an impossible crossover illusion. Next we add an extra coordinate to all points and place this 2D spline into 3D:
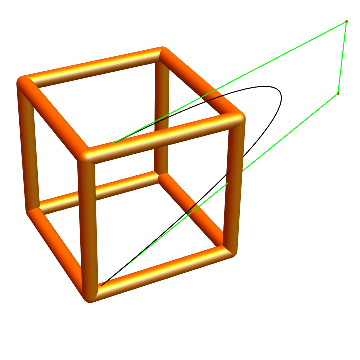
pts3D = Transpose[Transpose[pts]~Join~{ConstantArray[-1, 4]}];
Graphics3D[
 {{BSplineCurve[pts3D], Green, Line[pts3D], Red, Point[pts3D]},
  {Orange, Specularity[White, 20], GraphicsComplex[2 v, Tube[i, .1]]}},
 Boxed -> False, SphericalRegion -> True]
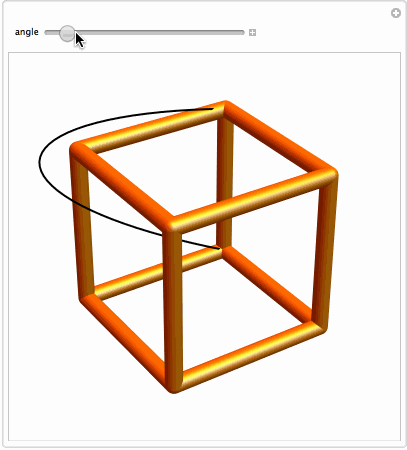
Next I apply rotation around the "illusion" edge:
Manipulate[Graphics3D[
  {{Thick, Rotate[BSplineCurve[pts3D], a Degree, {0, 1, 0}, {-1, -1, -1}]},
   {Orange, Specularity[White, 20], GraphicsComplex[2 v, Tube[i, .1]]}},
  Boxed -> False, SphericalRegion -> True, PlotRange -> 2]
 , {{a, -65, "angle"}, 0, -90}]
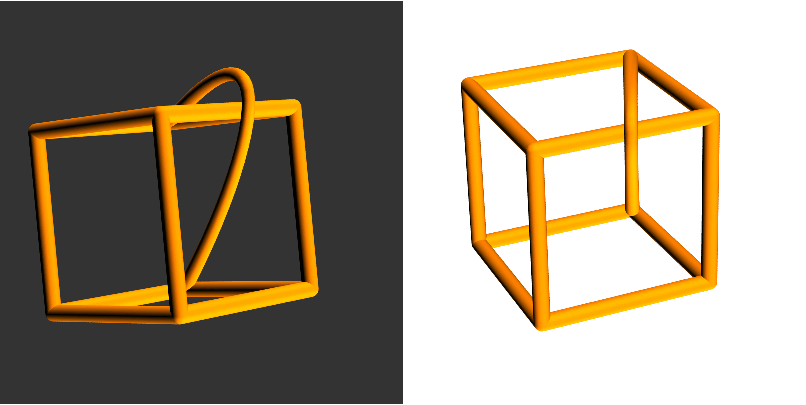
We finally make a first model:
Graphics3D[
 {{Orange, Specularity[White, 20],
   Rotate[Tube[BSplineCurve[pts3D], .09], -65 Degree, {0, 1, 0}, {-1, -1, -1}]},
  {Orange, Specularity[White, 20], GraphicsComplex[2 v, Tube[Delete[i, 2], .09]]}},
 Boxed -> False, SphericalRegion -> True]

As you can see it is not good. Too much light reflection pinpoints curvature of the "illusion"-edge. Also it should be slightly less thick because it should be most remote, but in reality it is of course is very close to viewer in the middle. The thickness can be fixed with variable spline thickness. For our example we need a tiny unnoticeable thickness variation, so here is an example for illustration:
Graphics3D[{Red, CapForm["Round"],
  Tube[BSplineCurve[{{0, 0, 0}, {1, 1, 0}, {1.2, 2, 0}, {.6, 1.8, 0},
    {0, 1.3, 0}, {-.6, 1.8, 0}, {-1.2, 2, 0}, {-1, 1, 0}, {0, 0,0}}],
 {.1, .1, .1, .1, .3, .1, .1, .1, .1}]}]
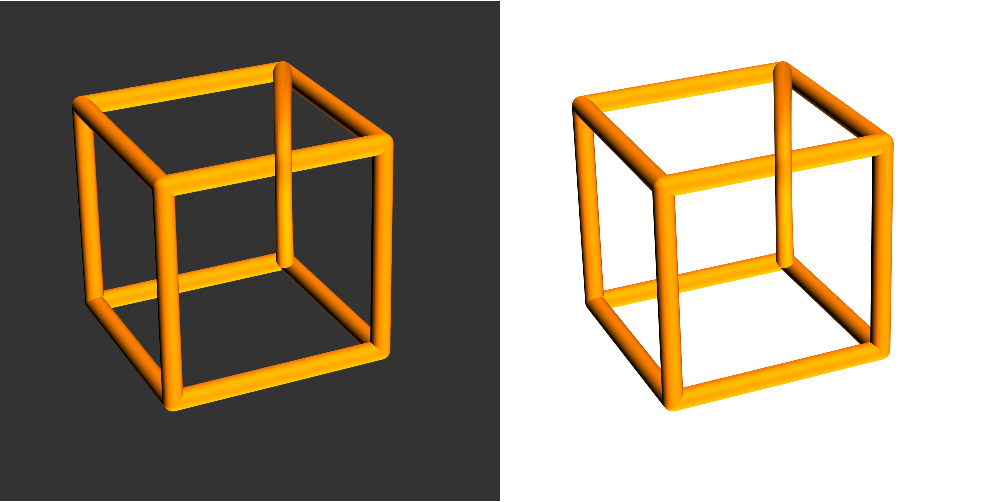
And the light is fixed by removing Specularity and providing a few sources to uniformly illuminate the "illusion"-edge:
Graphics3D[
{{Rotate[Tube[BSplineCurve[pts3D],{.09,.06,.06,.09}],-65 Degree,{0,1,0},{-1,-1,-1}]},
{GraphicsComplex[2v,Tube[Delete[i,2],.09]]}},
Boxed->False,SphericalRegion->True,
Lighting->{
{"Directional",Orange,{{5,5,4},{5,-10,0}}},
{"Directional",Orange,{{5,5,4},{5,5,0}}},
{"Directional",Orange,{{5,5,4},{5,50,0}}}}]
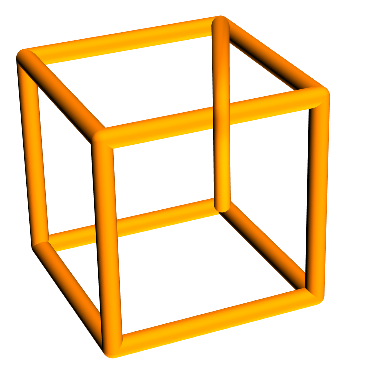
And this is much better, but once you know the trick you can notice light variations that betray curvature. There is a lot of room for improvement of course, feel free to post your ideas. I would need to take a better care of corner junctions bending the spline as Pierpaolo Andraghetti did. The original by Pierpaolo Andraghetti is exquisitely crafted, a beautiful work, nevertheless you still can see imperfections. For example, his beam, is rectangular as contrasted with mine which is round. If you look carefully along Pierpaolo's "illusion"-edge you can notice that sharp edge is getting vague, relative to other vertical edges. Constructing this in real life perfectly is a challenge, lighting is subtle. I think the best would be to give little lighting to allow the brain to "guess" and imagine the rest. This and other code for making GiFs is in the attached notebook.