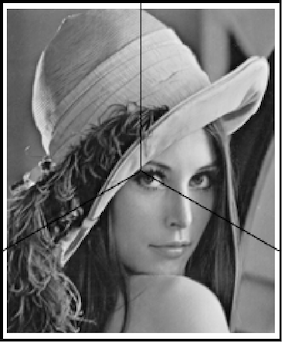
Perspective anamorphosis is when you need a specific viewpoint to observe an image correctly and any other viewpoint will give a deformed image. Inspired by Ewan Gedge's Inspiration on Pinterest, (left) I made a project of creating 3D perspective anamorphosis images using Mathematica. Here is "Lena from ExampleData " in a "square trihedral corner" (right).
To create a similar perspective anamorphism for viewing purposes only is quite simple in Mathematica using PlotStyle with Texture and a TextureCoordinateFunction. Some time ago, I uploaded the Wolfram Demonstration Perspective Anamorphosis of Photographic Images which can be used to make GIFs like these when adapted to a trihedron:
However, these GIFs make nice images but are hardly usable to make a real, printable object. What follows is how I made a printable and "make-able" trihedral perspective anamorphism. We want to look from infinity toward the 3 faces of a trihedron in the direction of its main diagonal and see an image undeformed.
We first create a vertically upright trihedron. Then, find the necessary rotation angles [Alpha] and [Beta] around the x- and y-axes, and the derived rotation matrix to set the diagonal vector (1,1,1) of a unit cube vertically upright at (0,0,Sqrt(3))
Solve[RotationMatrix[\[Alpha], {1, 0, 0}].RotationMatrix[\[Beta], {0, 1, 0}].{1, 1, 1} == {0, 0, Sqrt[3]}, {\[Alpha], \[Beta]}] /.
   C[1] -> 0 /. C[2] -> 0;
rMat = Simplify[
   Last[RotationMatrix[\[Alpha], {1, 0,
        0}].RotationMatrix[\[Beta], {0, 1, 0}] /. %]];
(PolygonCoordinates[#1] + 1/2 &) /@ PolyhedronData["Cube", "Polygons"];
triHedron =
  Map[rMat.#1 &,
   Polygon /@ %[[Position[%, {0, 0, 0}][[All, 1]]]], {3}];
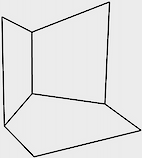
We first will make a setup similar to the rectangle in a corner of Ewan Gredge above. To simulate our viewing of the rectangle, we intersect the trihedron with a cuboid that has the desired rectangle as a base:
is = RegionIntersection[Cuboid[{-4, -5, 0}, {4, 4, 100}], #] & /@
   triHedron;
Graphics3D[{FaceForm[], EdgeForm[Thick], is},
 PlotRange -> .65 {{-10, 10}, {-10, 10}, {0, 16}}, Boxed -> False]
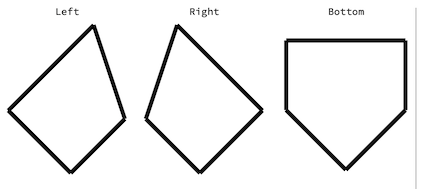
To proceed, we need a 2D drawing of the three faces by selecting view directions perpendicular to the faces of the trihedron:
(*3 viewvectors*)
Take[SortBy[DeleteDuplicates[Flatten[PolygonCoordinates /@ is, 1]],
   EuclideanDistance[{0, 0, 0}, #] &], {2, 4}];
GraphicsRow@
 MapThread[
  Graphics3D[{FaceForm[], EdgeForm[AbsoluteThickness[4]], is[[#1]]},
    Boxed -> False, ViewPoint -> %[[#2]]] &, {Range[3], {2, 1, 3}}]
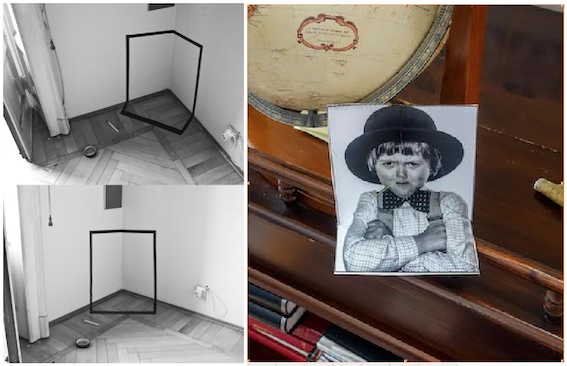
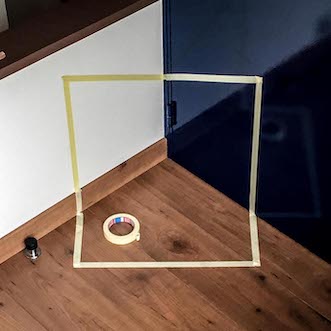
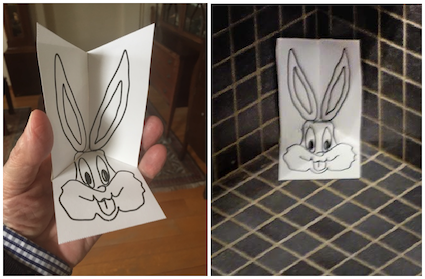
This is a makeshift setup of this using masking tape in a rectangular trihedral corner (of the kitchen):
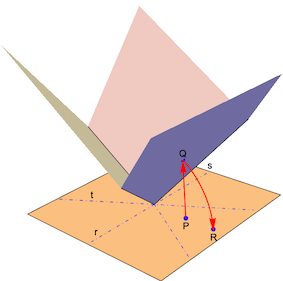
To get into more complex projects, we need a function that will map a point P in the x-y plane to the intersection Q of the vertical through P with the trihedron and then rotated around axis r, s or t back to the x-y plane as R.
From P to Q: computing the z-values of Q for each trihedral face:
Flatten[Solve[{{x, y, z} \[Element]
       Line[{{x, y, 0}, {x, y, z}}], {x, y, z} \[Element]
       RegionUnion @@ triHedron}, z] /.
    Rule[z, ConditionalExpression[value_, region_]] :> value] //
  FullSimplify;
(*{-Sqrt[2] y,(-Sqrt[3] x+y)/Sqrt[2],(Sqrt[3] x+y)/Sqrt[2]}*)
From Q to R: rotation around the appropriate axis in the x-y plane:
sector[pt : {x_, y_}] := Module[{\[Alpha]}, \[Alpha] = ArcTan @@ pt;
  Which[-\[Pi]/6 <= \[Alpha] < \[Pi]/2,
   1, -5 \[Pi]/6 <= \[Alpha] < -\[Pi]/6, 3, True, 2]]
trihedronPerspectiveMap[pt : {x_, y_}, \[Phi]_: - ArcSec[Sqrt[3]]] :=
 Module[{z},
  z = Switch[sector@pt, 1, (Sqrt[3] x + y)/Sqrt[2],
    2, (-Sqrt[3] x + y)/Sqrt[2], 3, -Sqrt[2] y, True, 0];
  Chop@Switch[sector@pt, 3,
    RotationMatrix[\[Phi], {-1, 0, 0.}].{x, y, z}, 2,
    RotationMatrix[\[Phi], {1, Sqrt[3], 0.}].{x, y, z}, 1,
    RotationMatrix[\[Phi], {1, -Sqrt[3], 0.}].{x, y, z}, _, {0, 0}]]
We can try out the function trihedronPerspectiveMap on a GraphicsComplex from one of the many "Popular Curves":
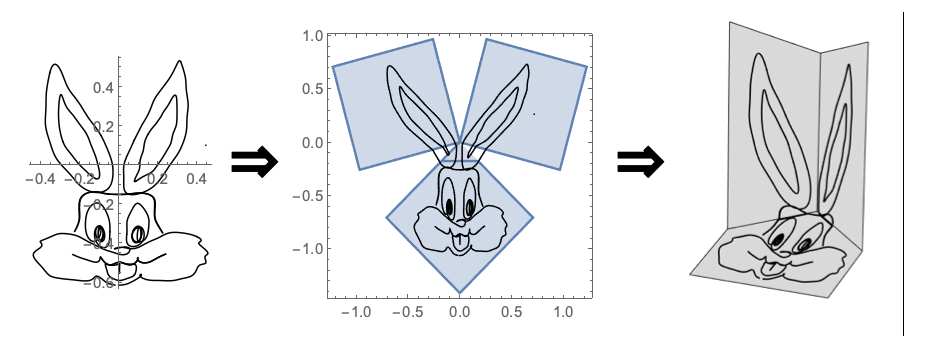
The parametric curve of Bugs Bunny is obtained using Interpreter. We extract the coordinates and apply the function trihedronPerspectiveMap to them. This is used to create a printable set of the 3 faces. When glued together, they make up a trihedral image.
Interpreter[
  Restricted["PopularCurve",
   EntityClass["PopularCurve", "LooneyTunes"]]]["bugs bunny curve"]
bugsbunnyPrimitives =
  First[ParametricPlot[%["ParametricEquations"][t], {t, 0,
      40 \[Pi]}]] /. {x_?NumericQ, y_?NumericQ} :> {x + 189, y + 150}/
     650;
allPts = Cases[
   bugsbunnyPrimitives /. Line -> Identity, {x_?NumericQ,
    y_?NumericQ}, \[Infinity]];
Animate[Module[{tbl, pt}, pt = AngleVector[{0, -.1}, {.2, \[Phi]}];
  tbl = (pt + #1 &) /@ (+allPts);
  Grid[{{"original", "2D printout view",
     "3D perspectiveview"}, {Graphics[{Blue, AbsolutePointSize[1.],
       Point /@ tbl}, Axes -> True, Ticks -> None, PlotRange -> .75],
     Graphics[{{Blue, AbsolutePointSize[1.],
        Point[ParallelMap[Most[trihedronPerspectiveMap[#1]] &,
          tbl, {1}]]}, {FaceForm[{White, Opacity[.85]}],
        EdgeForm[
         Thin], (Triangle[{{0, 0}, AngleVector[{10, #1 - \[Pi]/12}],
             AngleVector[{10, #1 + \[Pi]/12}]}] &) /@ {-(\[Pi]/
           6), \[Pi]/2, (7 \[Pi])/6}}}, PlotRange -> 1.185],
     Graphics3D[{triHedron, {Blue, AbsolutePointSize[2],
        Point[ParallelMap[trihedronPerspectiveMap[#1, 0.] &,
          tbl, {1}]]}}, PlotRange -> .7 {{-1, 1}, {-1, 1}, {0, 2}},
      ViewAngle -> 0.175, ViewCenter -> {0.65, 0.5`, 1},
      ViewPoint -> {1.434, 0.34, 5.94},
      ViewVertical -> {.2, 0.24, 0.95}, Boxed -> False,
      Lighting -> {{"Ambient", White}}]}}]], {\[Phi], 0, 2 \[Pi]}]
Finally, we want to test our function on a photographic image. Mapping the function pixel by pixel would be a solution. However, it is easier to create 3 perspective transformation functions and apply them to the complete image. This is "Lena" with the projection of the triHedron on top, dividing the image in 3 sectors.
ImageCrop[
  ImageAdjust@
   ColorConvert[
    ImageResize[ExampleData[{"TestImage", "Lena"}], {300}],
    "Grayscale"], {200, 242}];
data = ImageData[%]; img =
 Image[Show[{ListDensityPlot[Reverse@data,
     DataRange -> {{-.7, .7}, {-.85, .85}},
     ColorFunction -> GrayLevel, AspectRatio -> Automatic],
    Graphics[{FaceForm[], EdgeForm[Black],
      triHedron /. {x_?NumericQ, y_?NumericQ, z_} :> {x, y}}]},
   FrameStyle -> Thick, FrameTicks -> None], ImageResolution -> 200,
  ImageSize -> 200]
We take 3 reference (base) points in each of the 3 sectors and compute their perspective map with the function trihedronPerspectiveMap. We then find the necessary transformation function that converts the base points into the perspective points and apply the 3 transformation functions to our image.
basePoints =
  Table[Map[RotationMatrix[\[Alpha]].# &,
    CirclePoints[{.05, -.35}, .2, 3]], {\[Alpha], {0, 2 \[Pi]/3,
     4 \[Pi]/3}}];
perspectivePoints =
  Table[Map[Most@trihedronPerspectiveMap[#] &, p], {p, basePoints}];
transfoFunctions =
  MapThread[
   Chop@Last@FindGeometricTransform[#1, #2] &, {perspectivePoints,
    basePoints}];
ImagePerspectiveTransformation[ima, #, 300, DataRange -> Full,
   PlotRange -> All, Resampling -> "Nearest"] & /@ {tf1, tf2, tf3}
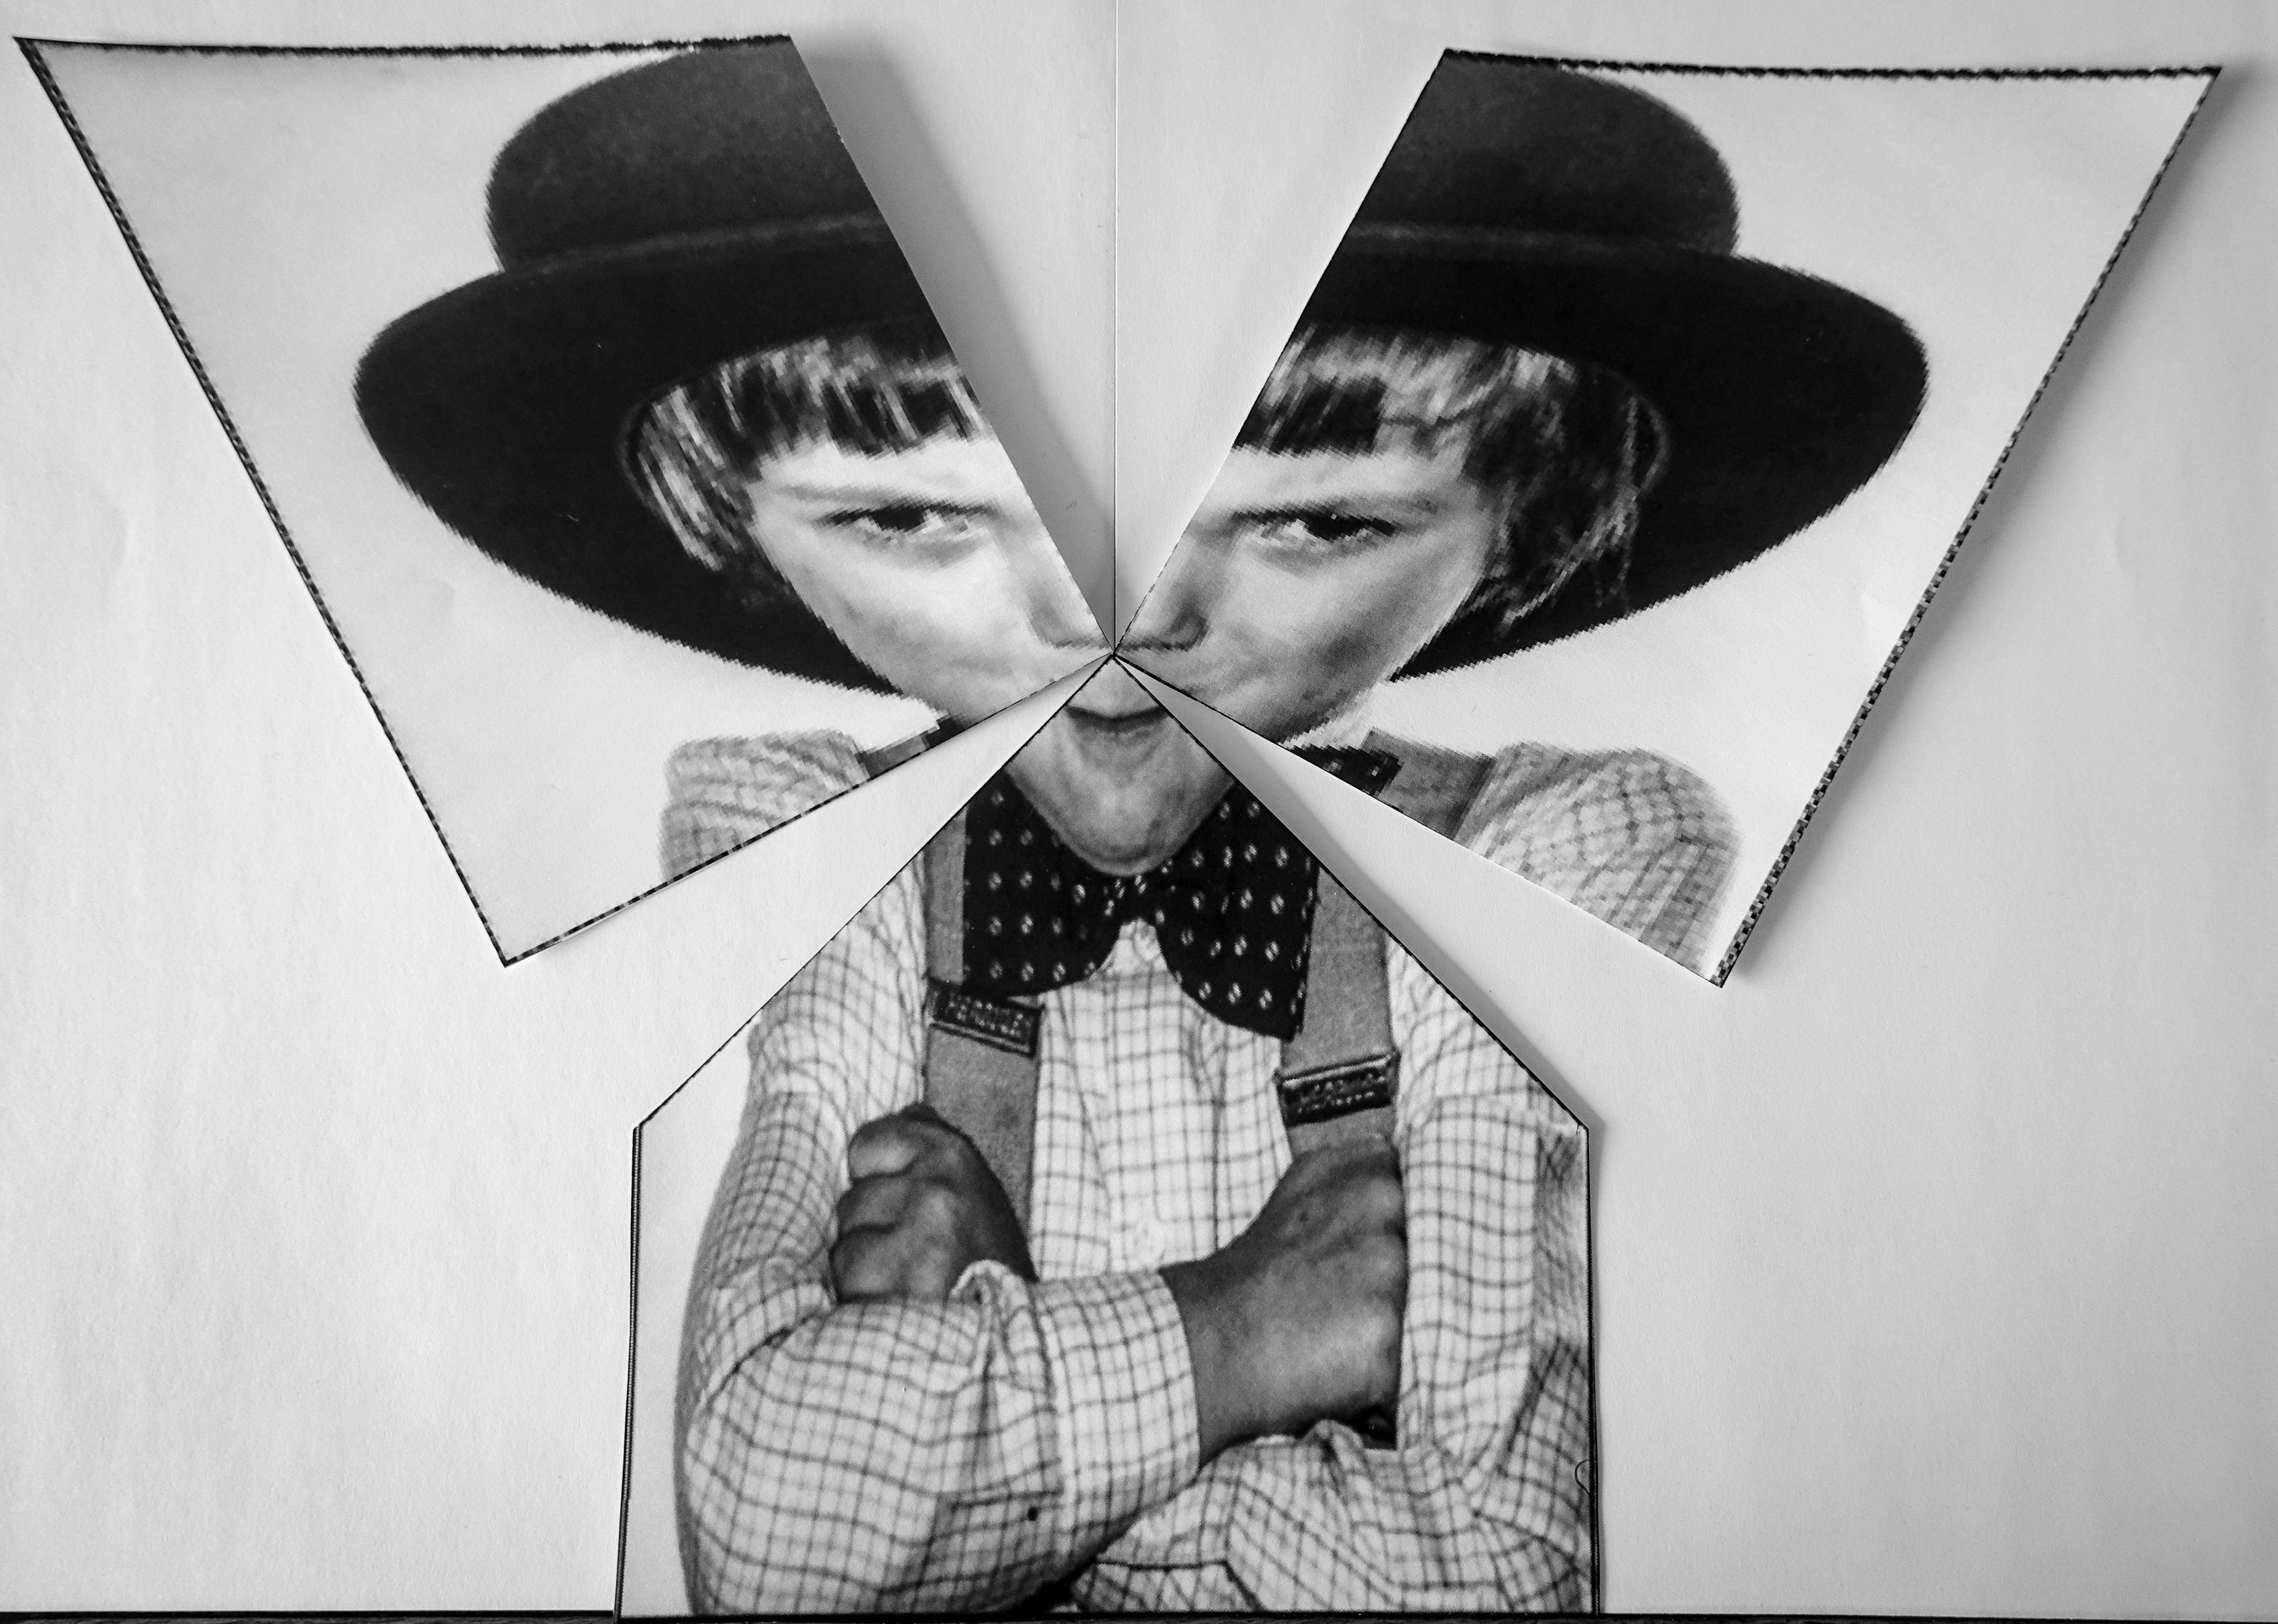
After cropping out the necessary parts and rotating:

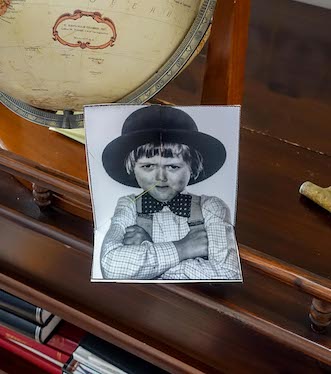
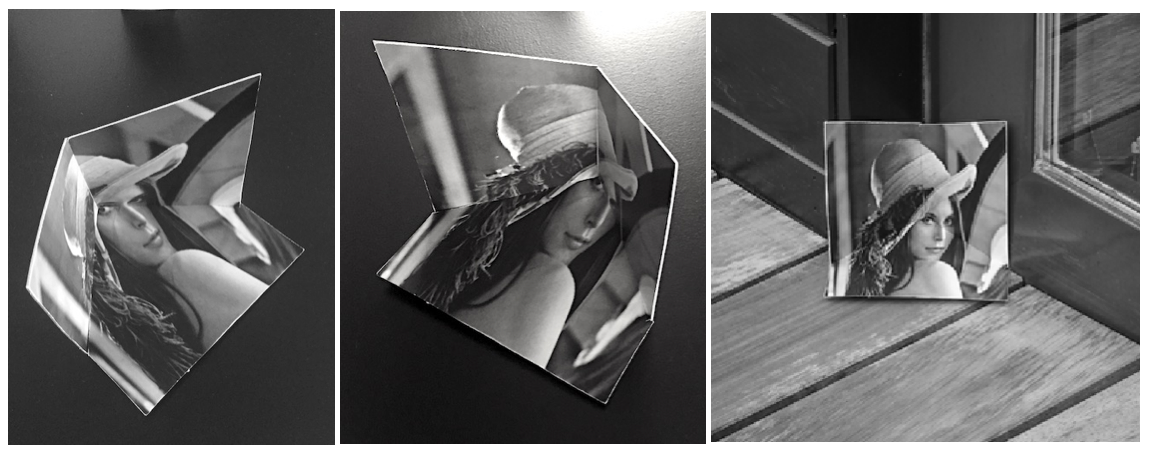
After assembling into a trihedron, the result looks like this:
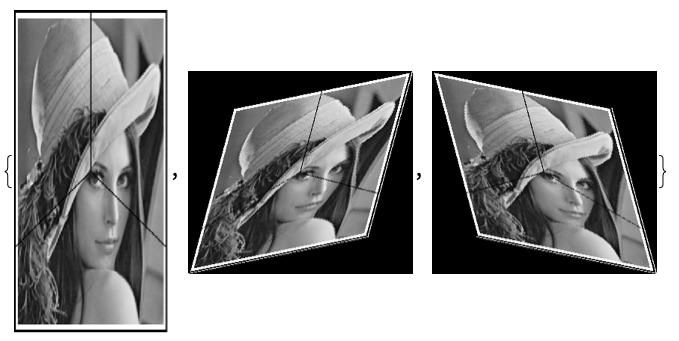
This is the same method used with another image, showing the 3 trihedron faces in 2D and the assembled trihedron.