Introduction
In this article we will create a simple driving simulation to train a classifier to autonomously drive a virtual car. Our simulation will consist of a 3D scene composed of a windy road and a single car controller either by the user or the computer. The car will have a camera positioned in front of it to provide an image from its point of view (POV). This point of view image will be used as the input to our classifier to decide how to control the car. During each step of the simulation the car will be allowed to move forward or turn in place left or right.
Building the Simulation
Simulation Graphics
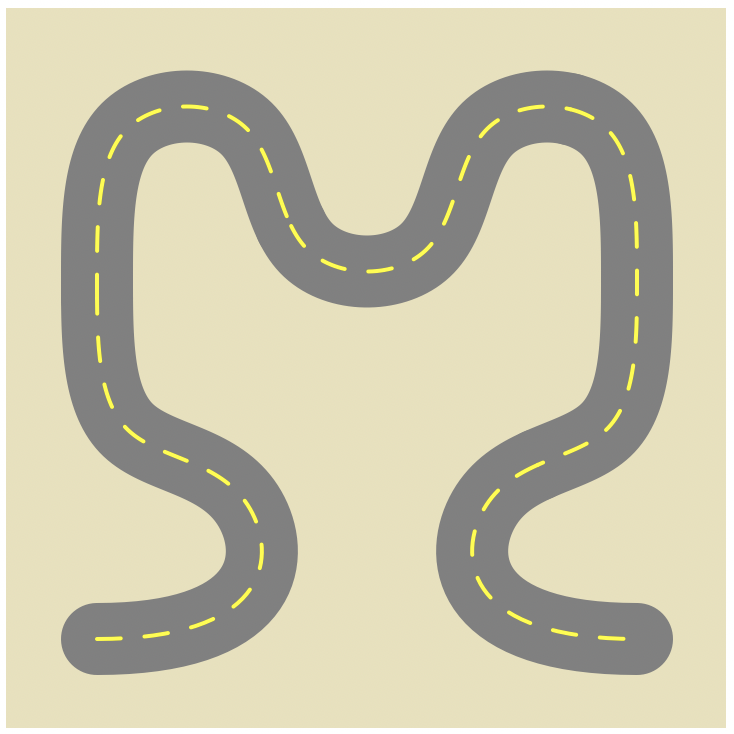
We will begin by creating the graphics functions to assemble and display the simulation. First lets create a texture for the ground. For simplicity we will rasterize a built-in curve containing both left and right turns for the road.
track = Rasterize[
  With[{road =
     HilbertCurve[2, DataRange -> {{0.25, 1.75}, {0.25, 1.75}}] /.
      Line -> BSplineCurve},
   Graphics[{
     CapForm["Round"],
     Gray, AbsoluteThickness[36], road,
     Yellow, Dashing[0.033], AbsoluteThickness[2], road
     },
    PlotRange -> {{0, 2}, {0, 2}},
    Background -> RGBColor["#e8e1ba"]
    ]
   ]
  ]
Next we will define a function to assemble the 3D scene encompassing the ground and car. We will be rendering this scene with two different cameras to provide an overview of the car on the road as well as the car's point of view image.
CarSimScene[sim_] := Module[{ground, car},
  ground = {
    Texture[track],
    EdgeForm[None],
    Polygon[
     {{0, 0, 0}, {100, 0, 0}, {100, 100, 0}, {0, 100, 0}},
     VertexTextureCoordinates -> {{0, 0}, {1, 0}, {1, 1}, {0, 1}}
     ]
    };

  car =
   With[{dimensions = {2, 1, 0}},
    {Red,
     Rotate[
      Cuboid[sim["Position"] - dimensions ,
       sim["Position"] + dimensions + {0, 0, 1}], sim["Rotation"],
      {0, 0, 1},
      sim["Position"]
      ]
     }
    ];

  {ground, car}
  ]
Lastly we need a function to position a camera in the 3D scene at the location of the car to record the point of view image. This image will only be used when classifying, so we rasterize at a relatively low resolution. After some experimentation I chose to use ImageResolution instead of RasterSize because it was over 2x faster to generate the final image. The ViewVector coordinates were determined experimentally to match the typical view from inside a car.
CarPOV[sim_] := Module[{
   rotation = sim["Rotation"],
   pos = sim["Position"]
   },
  Rasterize[
   Graphics3D[
    CarSimScene[sim],
    ImageSize -> Small,
    ViewVector -> {
      sim["Position"] + {2.1 Cos[sim["Rotation"]],
        2.1 Sin[sim["Rotation"]], 1.5},
      sim["Position"] + {5 Cos[sim["Rotation"]],
        5 Sin[sim["Rotation"]], -0.25}
      },
    ViewAngle -> 1.5,
    Boxed -> False,
    Background -> LightBlue,
    ViewRange -> {0, 0.1}
    ],
   ImageResolution -> 8
   ]
  ]
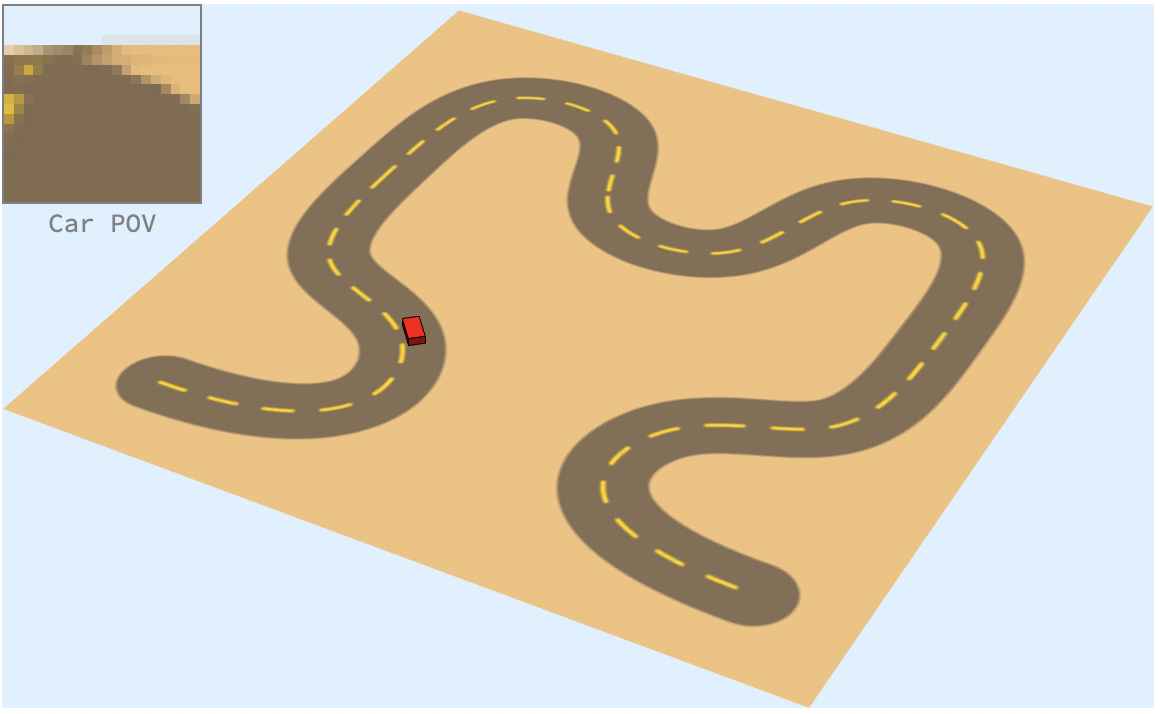
We can now put all of our graphics functions together into a single overarching function that displays the entire car simulation including the 3D scene and an inset from the car's point of view.
DisplayCarSim[sim_] := Module[{},
  Overlay[{
    Graphics3D[
     CarSimScene[sim],
     PlotRange -> {{0, 100}, {0, 100}, Automatic},
     ImageSize -> Large,
     Background -> LightBlue,
     Boxed -> False
     ],
    Labeled[
     Framed[sim["POV"], FrameMargins -> None, FrameStyle -> Gray,
      ImageSize -> Small], "Car POV", LabelStyle -> Gray]
    }]
  ]
Simulation Internals
With our simulation graphics complete we will proceed to building the functions that step the simulation forward. Our simulation state will be contained in a single association containing properties for the car's position, rotation, and current POV image, along with the history of all previous POV images and their associated actions.
NewCarSim initializes our data model for a new simulation. We allow a parameter to define which direction on the track the car starts from. We will generate training data in the "Forward" direction and then test the trained self-driving car in the opposite direction.
NewCarSim[direction_] := Module[{sim},
  sim = If[
    SymbolName[direction] == "Forward",
    <|"Position" -> {10, 10, 0}, "Rotation" -> 0|>,
    <|"Position" -> {90, 14, 0}, "Rotation" -> Pi|>
    ];
  sim["History"] = {};
  sim["POV"] = CarPOV[sim];
  sim
  ]
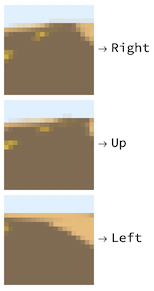
Advancing the simulation is easy, StepCarSim takes a simulation state and action, one of "Up", "Left", or "Right", and moves the car accordingly. Every time the simulation is stepped forward the current car POV image is saved along with the provided action in our history list. At the end of a simulation step a new car POV image is generated.
StepCarSim[sim_, action_] := Module[{},
   AppendTo[sim["History"], sim["POV"] -> action];

   Switch[
    action,
    "Left", sim["Rotation"] += 0.05,
    "Right", sim["Rotation"] -= 0.05,
    "Up",
    sim["Position"] += {Cos[sim["Rotation"]], Sin[sim["Rotation"]],
      0}
    ];

   sim["POV"] = CarPOV[sim];

   sim
   ];
SetAttributes[StepCarSim, HoldFirst];
Our simulation is nearly complete, now it is time to build the interactive interface which allows a person to drive the car and generate training data.
Generating Example Training Data
sim = NewCarSim[Forward];
EventHandler[
 Style[Dynamic[DisplayCarSim[sim]], Selectable -> False],
 {
  "LeftArrowKeyDown" :> StepCarSim[sim, "Left"],
  "RightArrowKeyDown" :> StepCarSim[sim, "Right"],
  "UpArrowKeyDown" :> StepCarSim[sim, "Up"]
  }
 ]
When I manually drove the car down the length of the entire track, the simulation generated nearly 600 training examples. This data is available in the Supplemental Materials section below if you would prefer not to create your own. Lets take a look at a few of the training examples:
TableForm@RandomSample[sim["History"], 3]
Training the Self-Driving Car
Having generated our example data, we are now ready to train a classifier to drive the car!
selfDrivingCar =
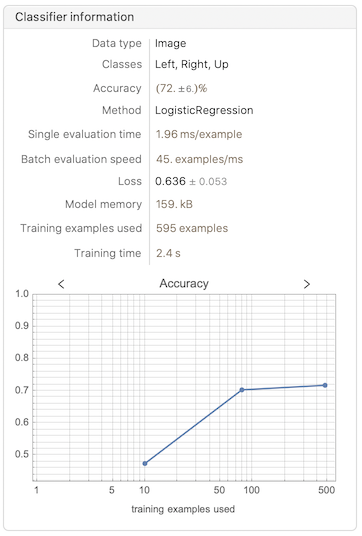
Classify[sim["History"], Method -> "LogisticRegression"]

I chose to specify logistic regression because it provided the best accuracy for a relatively small evaluation time. We can show information about our classifier and see accuracy above 70%. By inspecting the learning curve and accuracy curve it looks like we are approaching a limit to our learning, but could probably still benefit from a few more training examples. Still, with our modest amount of example data, the autonomous car performs well.
Information[selfDrivingCar]
To preview our self-driving car we will step the simulation one hundred times using our new classifier to drive the car. This only gets us a little ways around the track, but shows the classifier is working.
DynamicModule[{selfDrivingSim = NewCarSim[Backward]},
 Print[Dynamic[DisplayCarSim[selfDrivingSim]]];
 Do[StepCarSim[selfDrivingSim, selfDrivingCar[selfDrivingSim["POV"]]],
   100];
 ]

We could increase the number of steps to see the car drive to the end, but due to the relatively slow rendering performance I prefer to pre-render every 5th or 10th frame and assemble those in a Manipulate to easily pan back and forth through time:
selfDrivingSim = NewCarSim[Backward];
frames = Table[
   With[{img = Rasterize[DisplayCarSim[selfDrivingSim]]},
    Do[StepCarSim[selfDrivingSim,
      selfDrivingCar[selfDrivingSim["POV"]]], 5];
    img
    ],
   120
   ];

Manipulate[frames[[t]], {t, 1, Length[frames] - 1, 1}]

So, how well does our self-driving car work? Quite well as a matter of fact. It can easily make it down the entire track, and stays on the right side of the road too! But what happens if we start the car on the wrong side of the road? Does it get confused? Let's see:
DynamicModule[{selfDrivingSim = NewCarSim[Backward]},
 selfDrivingSim["Position"] -= {0, 4, 0};
 Print[Dynamic[DisplayCarSim[selfDrivingSim]]];
 Do[StepCarSim[selfDrivingSim, selfDrivingCar[selfDrivingSim["POV"]]],
   100];
 ]

When starting on the wrong side of the road the self-driving car immediately corrects and steers back to the right side! Our car works wonderfully, especially considering the modest training set and limited manual optimization of Classify.
Conclusion
In conclusion we can use Mathematica to create and render a 3D simulation while also interfacing with its machine learning tools to build a complete end to end experimental system. I hope this example provides some insight into the power of Mathematica's machine learning and graphics capabilities.
 Attachments:


