Introduction
The Wolfram Community site allows users to add an interactive notebook to their post, which seems to me to be using the WolframNotebookEmbedder library in the back-end. Similarly, various books published by Wolfram Media such as the Wolfram physics project allow for indexed interactive (notably "Copy to clipboard" functionality) notebooks with a nice sidebar. This is particularly nice for books/teaching when one would like to organize content in chapters/sub-chapters.
What follows is a short tutorial on how one can self-host one such 'documentation' website using the WolframNotebookEmbedder and Docusaurus, a powerful documentation site generator which uses React.
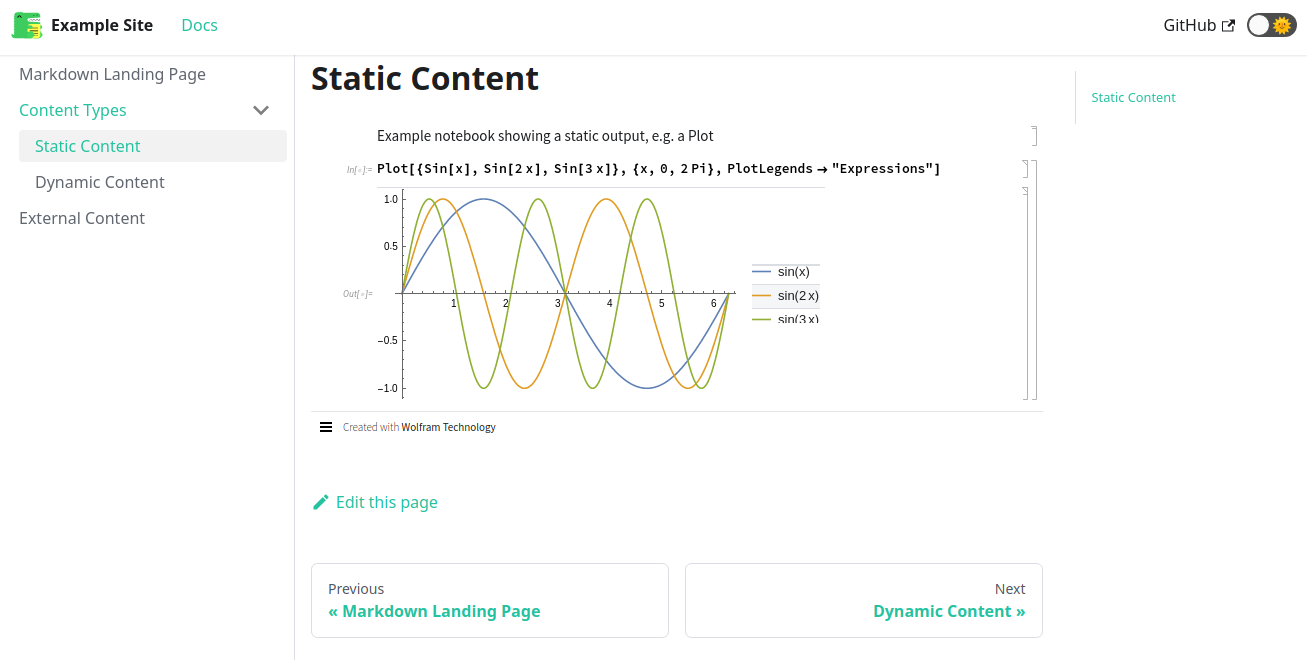
By the end of this tutorial, you should be able to self-host sites like this one here:

Note the (nested) sidebar on the left, and navigation links to previous/next pages.
Github Repository
We'll host our notebooks using Github pages, since it's free and simple to set up. If you're not familiar with git, see instructions here on how to set up a new github repository. In what follows, you'll see references to gvarnavi/self-hosting-wl-notebooks which you should replace with <your-github-username>/<your-repository-name>.
Note: the are other free self-hosting options, some of the ones supported by Docusaurus are listed here.
Cloud Notebooks
Let's create a local directory inside our repository with some dummy notebooks we'll be using for content. I made three notebooks called 1.static-content.nb , 2.dynamic-content.nb, and 3.external-content.nb inside a dummy-content/ directory, which you can see here. The naming, location, and content is not very important - we just need notebooks accessible on the public cloud. I copied the local directory to the cloud using the following snippet
CopyDirectory[
  "/home/george/Documents/git-repos/self-hosting-wl-notebooks/dummy-content",
CloudObject["dummy-content",Permissions->"Public"]];
Docusaurus
I'll be building this on a unix machine, but you should be able to follow installation instructions here for other platforms.
Requirements: Node.js >= 12.13.0 and Yarn >= 1.5
Initialize a Docusaurus site with the classic theme template, and change directory into the new website directory
npm init docusaurus@latest website classic
cd website
Add wolfram-notebook-embedder library as a dependency
yarn upgrade @docusaurus/core@latest @docusaurus/preset-classic@latest
yarn add wolfram-notebook-embedder
At this point, you can peruse the default site that Docusaurus makes by runing yarn start and navigating to http://localhost:3000/ on your browser. The default site ships with a landing page and blog-functionality, we'll strip away a lot of these features to only keep the documentation (but they are of-course easy to add).
Remove blog, landing page, and template docs
rm -rf ./blog/
rm ./src/components/* ./src/pages/*
rm -rf ./docs/*
Add the following file to a new file called ./docs/landing-page.md. The important thing here is to set slug: / in the front-matter.
Edit the docusaurus.config.js file to something like this configuration file. The important settings are:
# under presets
blog: false,
docs: {routeBasePath: '/',}

# under themeConfig, items
docId:"landing-page"
and that you change my github repo settings with yours.
- At this point, you should hopefully be able to run
yarn start and see something similar to this landing page
Docusaurus has a lot of features, and an excellent documentation so I would suggest perusing that.
Wolfram Notebook Embedder
Docusaurus has built-in support for MDX, which allows you to embed Javascipt inside markdown files and render them as React components. We'll make use of this to embed our notebooks from the cloud!
First, we need to create a WolframEmbedder component. Copy the following into a file called ./src/components/WolframEmbedder.js
    import React from 'react';
    import * as WolframNotebookEmbedder from 'wolfram-notebook-embedder';

    class NotebookEmbed extends React.Component {

      componentDidMount() {
        this.embedding=WolframNotebookEmbedder.embed(
            this.props.url,
            this.el,
            {
               allowInteract:true,
               showRenderProgress: true

            }
        );
      }

      componentWillUnmount() {
        this.embedding.then(nb => nb.detach());
      }

      render() {
        return <div className="NotebookEmbed" ref={el => this.el = el} />;
      }
    }

    export default NotebookEmbed;
This will create a reusable React component we can call with a single argument specifying the cloud notebook's url.
We can then make additional documentation pages which mix markdown and calls to the WolframNotebookEmbedder, e.g. like so:
---
id: static-content
sidebar_position: 1
title: Static Content
hide_title: true
---

import NotebookEmbed from '@site/src/components//WolframEmbedder.js'

## Static Content

<NotebookEmbed url='https://www.wolframcloud.com/obj/gvarnavi/dummy-content/1.static-content.nb'/>
Where I'm embedding the 1.static-content.nb notebook found here.
The example site here has the following directory structure under docs
docs
├── content
│   ├── _category_.json
│   ├── dynamic-content.mdx
│   └── static-content.mdx
├── external-content.mdx
└── landing-page.md
Note the ending .mdx for files which include calls to the WolframNotebookEmbedder. You can see the contents of all the files here.
Deployment
If everything works as expected locally, it's very easy to deploy your site to github pages.
First, build production-quality static files by running
yarn run build
If this works, and your github repo settings in the config file are set correctly you can simply run:
GIT_USER=<GITHUB_USERNAME> yarn deploy
and then head to your repo's Page settings to see it's hopefully deployed! (e.g. for my configurations the settings would be here https://github.com/gvarnavi/self-hosting-wl-notebooks/settings/pages, note this page should not be accessible to you).
Thoughts
This seemed like a relatively straight-forward way to self-host wolfram notebooks in a flexible framework which provides many documentation features, specifically the ease of markdown and React components - hopefully it's useful to some!