Note: This post is originally from my website, but I thought it might be of interest to some WC readers as well.
The Go! Link from Vernier Software & Technology (Vernier), is a USB adapter for their proprietary sensors which also provides some basic features such as a buffer, sensor auto-identification and raw voltage reading conversion.

Vernier provides a software development kit which allows programmers to use Go! devices in their own systems. I often think about how one can build a flexible sensor system using Vernier's products and based on the inexpensive Raspberry Pi computer and the powerful data analysis and visualization tools of Mathematica. This project isn't new, and my earlier attempts were highlighted on the Raspberry Pi blog and I recently announced a previous version of this software package. What I'm presenting now is a more user-friendly system that makes data collection easy through the device driver framework incorporated into Mathematica.
Getting Started
In addition to the Go! Link adapter, you'll need at least one of the 66 sensors that are compatible with the adapter. I do most of my Raspberry Pi work on a v2 unit, so I know it works on this version. The graphical interface for Mathematica is very clunky on RPi's earlier than a v2, but sensor reading can be done with the command line interface (via wolfram) using this package as well.
The source code can be downloaded from my project page on Github and since this post is based on version 1.1 of the software, it is probably best to download the relevant files directly from the release page for this version. Installation instructions are provided there, so I won't repeat it here.
Basic Operation
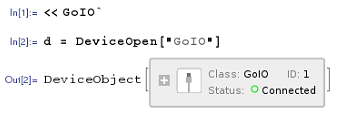
There are two basic methods for accessing sensor information: one is through the device framework and the other is through the device properties. I assume most users will jump back and forth between these two methods. The framework consists of the Device* functions in Mathematica: DeviceOpen, DeviceRead, DeviceReadBuffer, and DeviceConfigure. (There are a few other Device* commands, but I don't use them in this package.) Once the software has been installed, starting a sensor session is as easy as starting Mathematica and in a new notebook running:
<<GoIO`
d = DeviceOpen["GoIO"]

Once a connection is established, DeviceRead["GoIO"] can be used to read an average of all the sensor readings currently in the buffer or DeviceReadBuffer["GoIO"] will print a list containing all values currently in the buffer. The default measurement period is 0.040 seconds and the buffer can store 1000 values. If you want to change the measurement period, it can be done with DeviceConfigure["GoIO", {"MeasurementPeriod" -> 1}]. Presently, the software does not automatically detect if the user changes the sensor, and a call to DeviceConfigure["GoIO"] is necessary when the sensor is switched.
The device has several properties, which can be found using the commands d["Properties"] and d["NativeProperties"]. (Note. d is the symbol used in the DeviceOpen command mentioned above, and could be something different if you desire.) Properties such as d["Read"] and d["ReadAll"] do the same as the framework functions, but with properties, it is possible to figure out the name of the sensor (d["Name"]) and what units the sensor readings are in (d["Units"]). The "NativeProperties" (of which, there are one at present) are properties that can be changed, so the user can also change the "MeasurementPeriod" with d["MeasurementPeriod"] = 1.
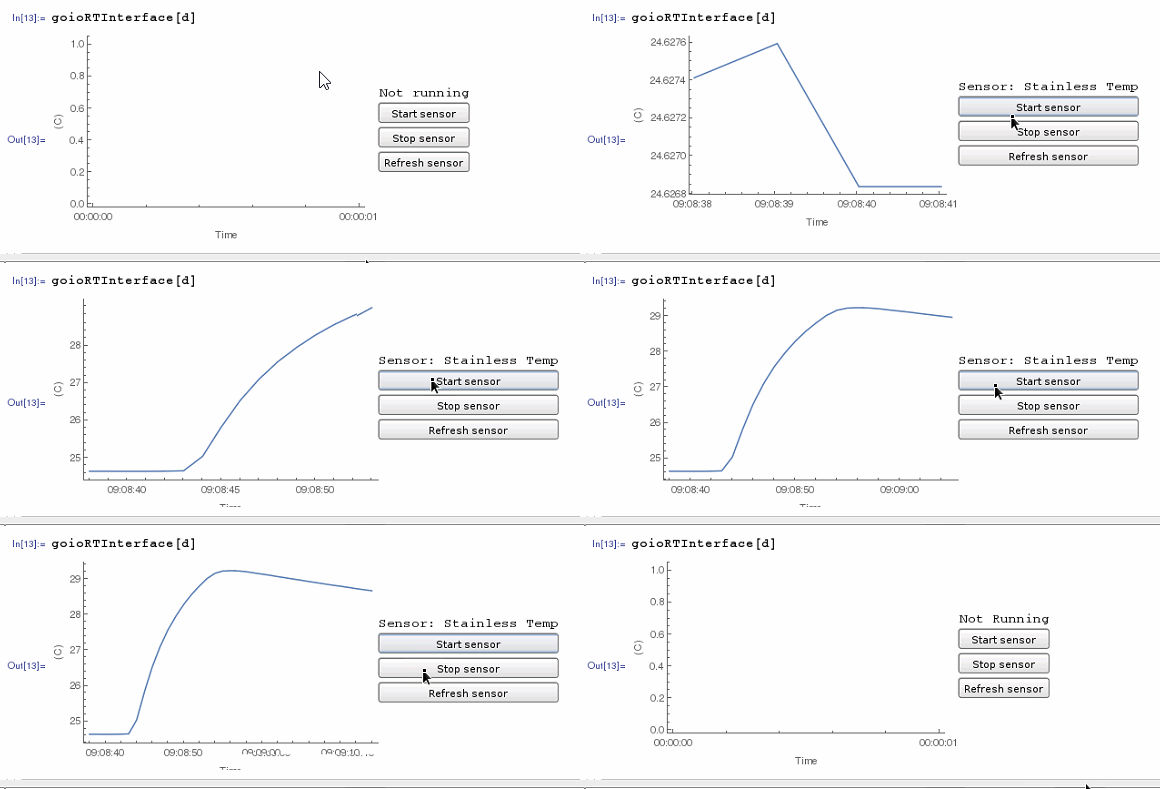
Finally, there is a simple interface that allows for real-time charting of the sensor data. Running goioRTInterface[d] yields:

Data collection
A major feature of v1.1 is the ability to conduct an experiment and easily store the sensor information. Running an experiment involves two steps. The first is to create an experiment with tsk = goioExperiment[<spp>,<np>,"Title"-> <title>,"Comment"-> <comment>], where spp is the seconds per point and np is the number of points that will be acquired. Both "Title" and "Comment" are optional, but "Title" should be filled in as it is used in other features of the package. This function returns what is called a ScheduledTaskObject which we have to start when the experiment is supposed to begin. Starting a task is done with StartScheduledTask[tsk] and a message (a terse 'Done') will be printed when the experiment is over.
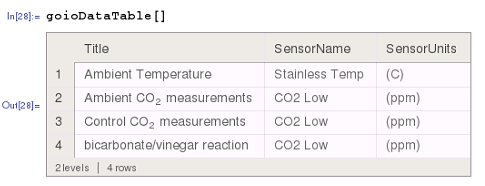
Once completed (well, not technically true, since you can run these commands during the experiment), a list of all experiments run during this session can be obtained with goioDataTable:

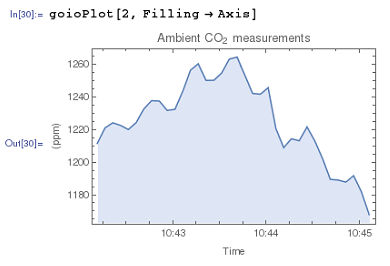
The experiment number is used as an identifier; for example, to plot the first set of data, one would use goioPlot[1].

This function uses all of the options of DateListPlot, which allows for a fair amount of customization if the end user desires. For further customization or analysis, the sensor data can be extracted as a list with goioDataList[1], which returns a list of {x,y} pairs where the time is now in seconds as opposed to dates. Finally, the user can store the data by saving the packages session symbol with a command Save["<filename>", $GoIOSessionData]. All of the experiments are stored in that one symbol and can be restored (via Get) at a later date.
Conclusion
Version 1.1 is reasonably stable and in my opinion provides end users with a functional data acquisition system using Vernier sensors, a Raspberry Pi and Mathematica. My intent is to add features and functionality, along with error-checking and documentation, in subsequent v1.x releases. My goal is to have a solid foundation in place so that v2.0 will come with suitable functionality and documentation that can be used to create laboratory experiments in the high school and undergraduate teaching environments.